How to Dial in Espresso at Home – Pro Barista’s Guide
Are you tired of your homemade espresso shots falling short of that perfectly balanced, barista-quality flavor?
Don’t worry, we’ll fix it now. I’m here to share the professional secrets of dialing in the perfect shot, right in your own kitchen.
By the end of this article, you’ll be pulling consistently great shots on any espresso machine.
Let’s dive right in.
What does it mean to “dial in” your espresso?
When we talk about dialing in espresso, we mean the process of fine-tuning the brewing variables to produce a shot with a balanced, flavourful taste.
And let me tell you, it isn’t easy. It is a process of trial and error, but in the end, you will hone in on the perfect cup.
Espresso Variables You’ll Play With
It’s important to understand each of the variables that you can modify during the workflow, and how they contribute to the overall taste of the shot.
They are:
- bean dose
- grind size
- tamping
- brewing water temperature
- yield
- extraction time
- coffee roast level
Let’s go through each variable.
Coffee Dose
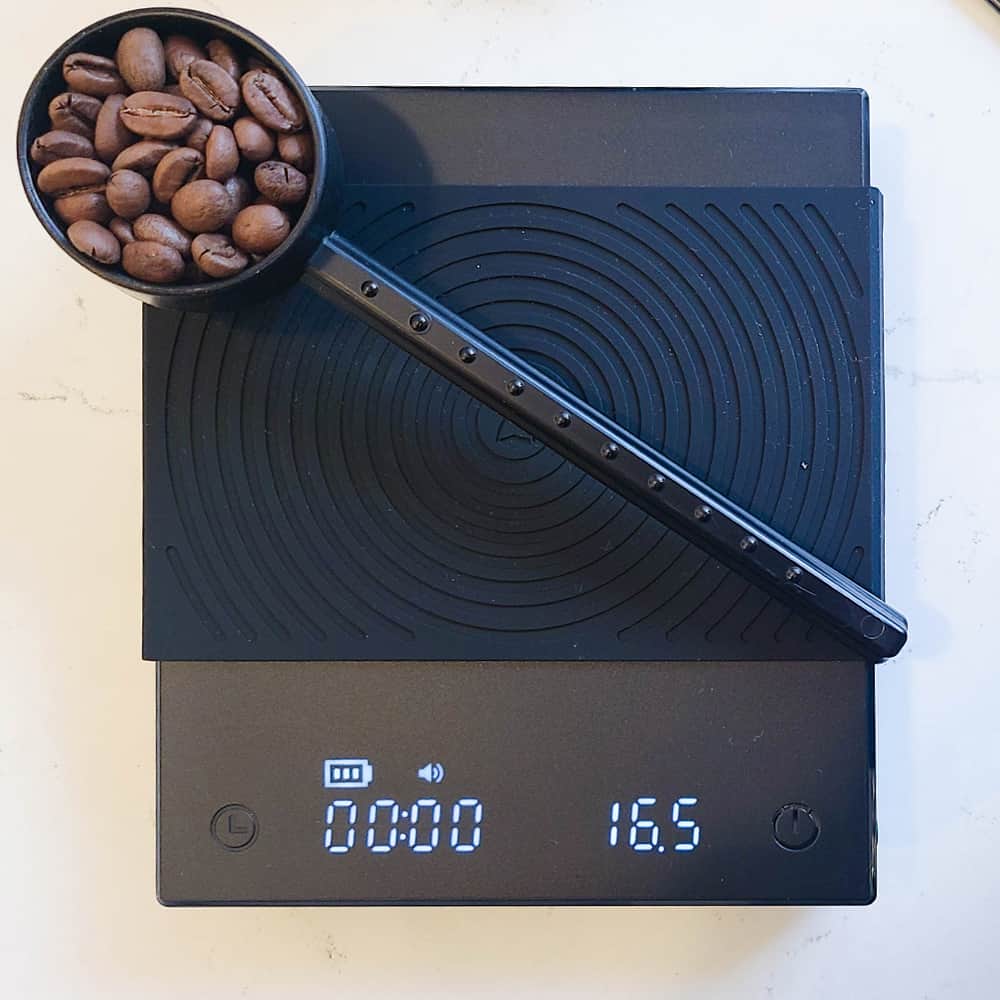
Making consistently great espresso requires using a digital scale, like this one, to weigh your coffee dose. It’s important to use an exact measure of ground coffee beans for each shot, so forget about “teaspoon” measurements from now on.
The rule of thumb is to start with 18g per double shot, and modify it +/- 2g to your taste. Any less than 16g of coffee will under-extract your drink, resulting in an insipid cup. Any more than 20g will risk over-extraction, or choking your coffee puck.
Grind Size
By varying your grind size, you modify the size of the coffee particles the brewing water runs through. The finer your grounds are ground, the slower the water can flow through your puck. You want just enough resistance of water flow, but not too much.
Dialing in your grind size is a game of trial and error. If you have all of the other variables perfect, tweaking the grind size will create the perfect shot.
Tamping
Tamping is the process of applying pressure to coffee grounds in order for them to be properly packed into the filter basket.
It’s important that you use enough force and apply even pressure of about 30lbs/14kg, so all the ground beans are compressed nicely.
- Too little pressure will just allow the water to run through the loose grinds,
- Too much pressure will make the coffee puck resistant to water flow and may result in channeling during extraction, or choking.
My top tip here? Make sure there’s good consistency with every tamp. It’s a good idea to get a weight scale, put it onto a table, and press down on it with your arm. You’ll be surprised at how hard you need to push.
Brewing Water Temperature
The generally accepted, optimal brewing water temperature for espresso is 93°C.
However, you may want to up this slightly for light roasts, or lower it for darker roasts.
Yield and Brew Ratio
The yield of espresso is the weight of the finished shot in grams.
This was odd when I started my training to be a barista, since in elementary school, we all learned that measuring liquids goes by volume, not weight.
So why do we measure the amount of coffee in grams, not milliliters?
Because the crema of espresso adds volume (ml), not weight (g). The more crema you have, the larger the milliliter volume would be, but the gram weight would stay essentially the same.
Using grams essentially takes crema out of the equation.
The brew ratio of espresso is the ratio of your coffee bean dose to the yield. Specialty coffee sets this at 1:2, meaning that for example, an 18g dose should results in a 36 g yield double espresso. You can tweak this to your liking, but it’s essential that your shots don’t become overly concentrated (too small brew ratio), nor watery (too high ratio).
My recommendation?
After playing around with different doses, my ideal brew ratio is 1:25. I would recommend you try a few shots with ratios between 1:2 to 1:3, and see which you like the most. I personally think 1:2 is too strong, so I dial my shots in to come closer to a 1:3 coffee to water ratio. This means that for 16g of coffee, I am aiming to get around 48 g yield in the end.
Here is a lengthier article on espresso yields and ratios.
Extraction Time
Finally, we come to extraction time, the final piece of our espresso dialing-in puzzle.
From my experience, the proper extraction time range is about 30 seconds, starting the moment the machine’s compressor starts pumping water into the grinds. Preinfusion counts as well.
Now this is a hotly debated topic in the barista world. Some say 25 seconds is good. Some go a bit above 30 seconds. Some only start the timer from when the first drip is seen in the cup. Which is correct? The one you like most, and stick with consistently. Since in the end, your taste buds will give you the answer.
One thing is for sure, much longer than my recommended 30 seconds will mean over-extracting, but much shorter will under extract your grounds.
A good barista should be able to eyeball each pull – but a digital timer is important in this. Unless you want to count Mississippis with each shot 🙂
Coffee Roast Level Changes Everything
Now that you have an idea of the variables, let’s blow it all apart, and introduce coffee roast levels, which will modify everything.

Yes, using a different roast could throw off your recipe. Roasting has a huge impact on an espresso shot, so if you use different blends of beans this will affect extraction levels too.
When changing your beans, you will need to dial in for the new bean type and adjust every variable accordingly.
Tools Required For Dialing In Espresso
Now let’s go through each tools you’ll need to dial in your shots.
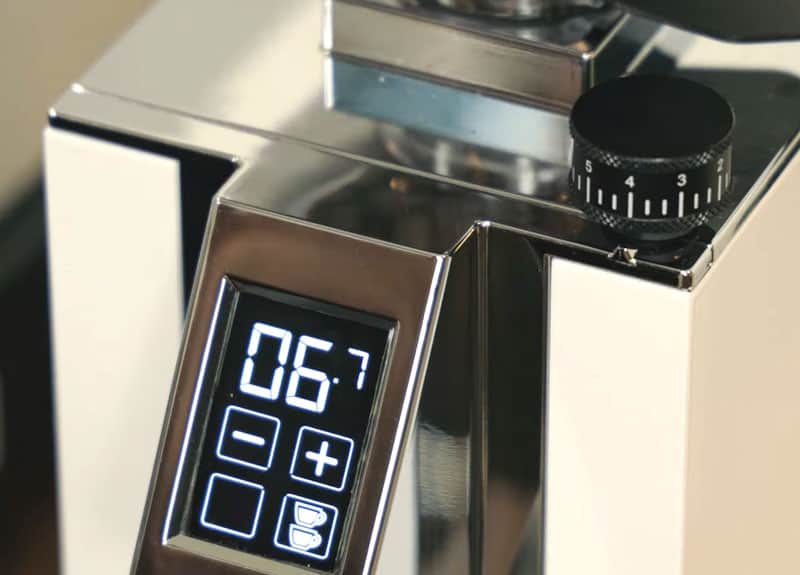
Coffee Grinder
The coffee grinder is probably one of the most important tools in any barista’s arsenal – if not THE MOST IMPORTANT.
It has a direct impact on your espresso extraction process and often determines how good or bad it turns out.
You need to get a burr grinder that can grind to fine grind size. Using a blade grinder is out of the question, and some burr grinders are not capable of grinding so fine either.
Both manual and electric burr grinders can be great, but know that grinding to an espresso fine with a manual grinder is not easy.
If espresso is your drink of choice, I recommend you get an electric burr grinder. Hand-cranked grinders require much more muscle power (not my strong suit).
Tamper
The tamper is used to tamp your coffee grinds in your portafilter basket.
- Flat tamper – this is a simple and straightforward design featuring a flat base that evenly compresses espresso grinds. It’s easy to use but doesn’t always provide consistent tamping pressure.
- Convex/Bell tampers – these feature a slightly rounded bottom that prevent side-channeling, but they are harder to use since applying eve pressure while keeping it leveled is tricky.
- Adjustable tamper – Modern industrial design has revolutionized the way coffee is prepared. Adjustable tampers are a great example of this, allowing you to customize the amount of pressure applied to coffee grounds, as well as keeping it leveled for optimal extraction.
I suggest you start out with a normal flat tamper, and upgrade to an adjustable one later on.
Portafilter and basket
The portafilter is the handle-like component of an espresso machine that holds the coffee basket and grounds before, during, and after extraction.
There are different types of baskets available depending on what type or size shot you want; single/double/pressurized, etc. You can also upgrade later on, just make sure you know what size your machine requires.
If you get a decent espresso maker, the stock portafilter baskets will probably be OK. However, cheaper machines sometimes come with terribly made baskets, which have smaller/larger holes, unaligned spacing, etc.
I have a longer article explaining portafilter baskets here. You can also ensure more consistent extractions by using an espresso puck screen.
Scale
Scales are an essential tool when dialing in espresso.
You will use it to:
- measure your coffee does
- measure your espresso yield
You can’t make a great cup of coffee without the right dose and yield, period.
The scale also allows us baristas to adjust our recipes depending on what tastes best with certain coffees, but we only need to do it once or twice with each batch of coffee.
I use and recommend this Timemore barista scale, it is all you need.
Make sure whatever scale you use has accuracy within at least 1/10 gram increments so there’s plenty enough room to fiddle around until reaching perfection. Tiny adjustments are needed to truly dial in an espresso.
Espresso Machine
The machine itself understandably plays a major role when it comes to dialing in your shot and creating that perfect cup.
When choosing an espresso maker, there are several factors to consider, such as
- size (can vary drastically from small countertop models to larger prosumer or commercial ones),
- type/style,
- features (pre-infusion, etc.)
- budget (espresso machines can be expensive, but don’t worry, there’s something for just about any price range).
Here is a comparison of some great Sage/Breville espresso makers that offer good value for money. I personally use this Barista Pro model, which is an espresso machine and grinder in one.
You can also check out my list of the best automatic espresso machines in the market this 2024.
Whichever way you decide on going regarding brand choice, always make sure those seals remain tight. If properly taken care of by regular maintenance, they should last many years.
Step-by-Step Guide To Dialing In Espresso
Now let’s get into the reason you’re here, my step-by-step guide on how to dial in an awesome shot of espresso:
Preliminary steps
There are a few things you want to do before anything else. These are not part of dialing-in per se, but are important in brewing espresso:
- Purge your group head to warm it and remove any grinds possibly stuck on it.
- Warm your portafilter, basket, and demitasse. Click here if you’re looking for the best demitasse cups in 2024.
- Dry the coffee basket before putting grinds into it.
And that’s pretty much it.
Step 1: Weigh The Coffee
Weighing your coffee is the first step to making an amazing espresso. This will ensure that you get a consistent flavor from cup-to-cup, and also help make sure it’s not too strong or weak for your tastes.
For most people getting started, I recommend starting with 18 grams for a double shot. You can experiment with this later. Personally, I tend to use 16-17 grams with medium-dark roasts, and 17-18 grams with lighter roasts.
And yes, the world of coffee uses grams (not ounces), so make sure you have your scale set to metric units before beginning, not imperial.
Step 2: Adjusting the grind setting
Once you have the coffee dose weighed out, it’s time to grind. The fineness of the grounds plays a huge role in how your espresso tastes. If they’re too coarse or too fine, then neither will do justice for your cup so make sure that this step is done right.
Each grinder is different, so you will need to experiment a bit. Also, refer to the instruction manual of your grinder for its recommended settings.
Dialing-in your grinds involves trial and error. Taste each shot, and slowly adjust the grind size until you get a good flow rate, extraction time and yield.
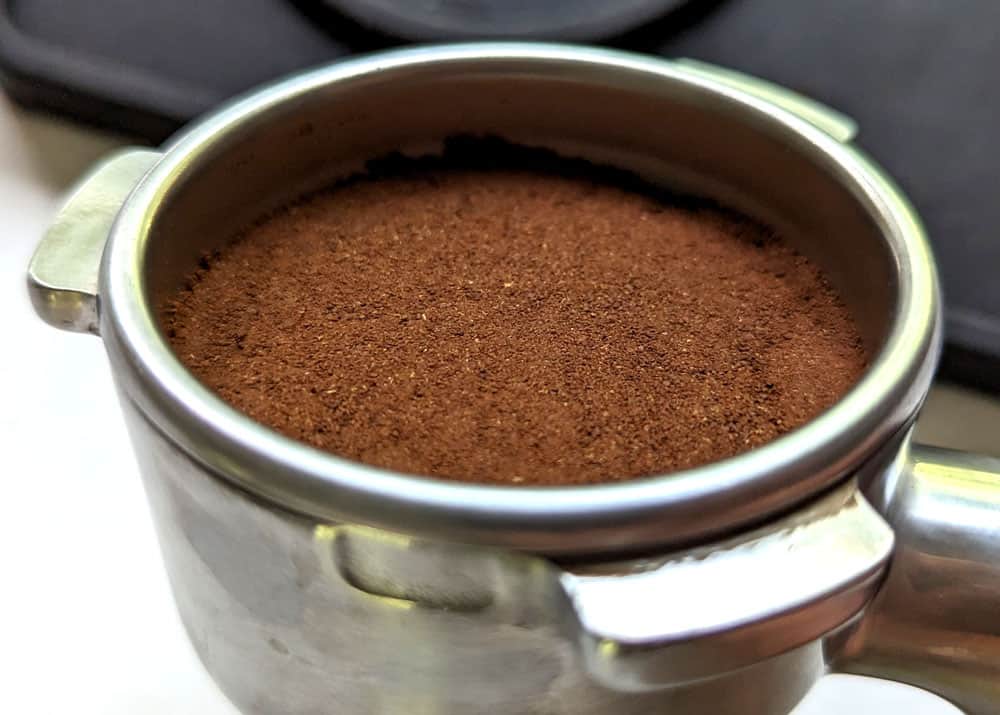
Step 3: Level your grinds in the portafilter
Long gone are the days when you just tamp your grounds after grinding.
With all the scientific studies from the era of 3rd wave coffee, we now know that distributing your grinds in the portafilter and leveling them makes the espresso much better than traditionally made ones.
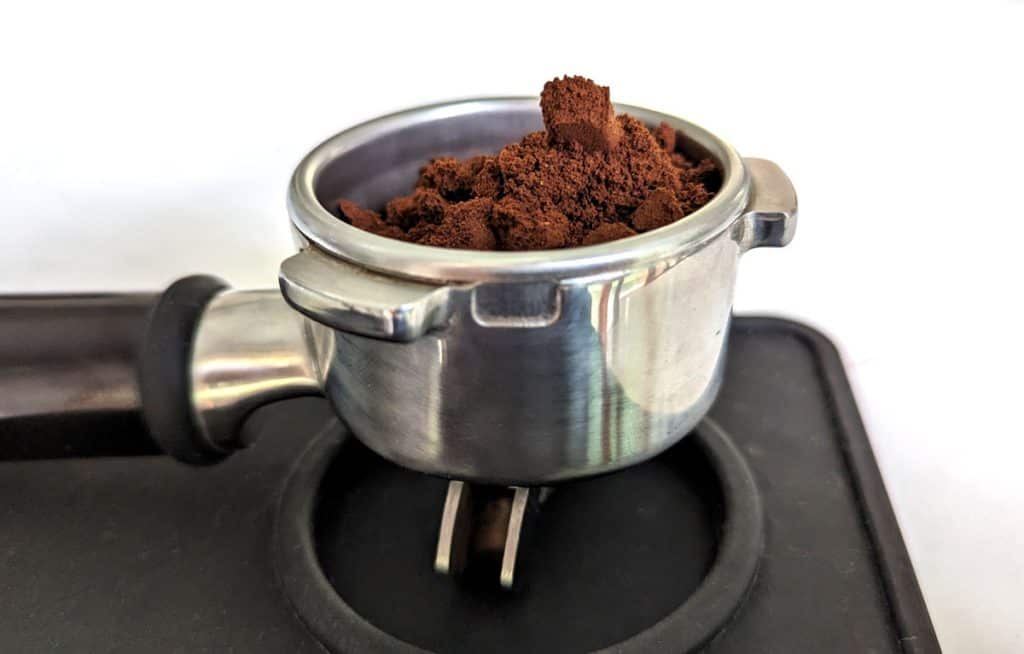
At a bare minimum, tap the portafilter 5 times against a tamping mat on the countertop to remove the mountain and distribute the grinds in the basket.
But if you want to go the extra mile:
- Use a WDT tool to break up the clumps in your grinds, and
- use a puck leveling too to level them.
Step 4: Consistent Tamping
Once you’ve leveled your grinds, it’s time to start tamping.
Here is a detailed article on how to tamp properly.
- To get started, make sure your tamper is clean and dry, otherwise the grinds will stick to it.
- Then place the tamper into the portafilter basket and press into the coffee bed straight down with 14 kg of force, creating an even surface. Use your thumb and index finger to check whether it is properly leveled.
- Once it feels right, lift it away carefully.
You can also get pressure-calibrated tampers to help keep consistency. They actually help a lot, since this is one of those variables that can easily differ between shots, and you may not even notice it.
Step 5: Extract The Espresso
It’s time for extraction, so make sure your portafilter is firmly locked into place and hit that brew button. The timer on your espresso machine should start, but if it doesn’t have one, use a stopwatch. Here’s a guide on how to time your espresso.
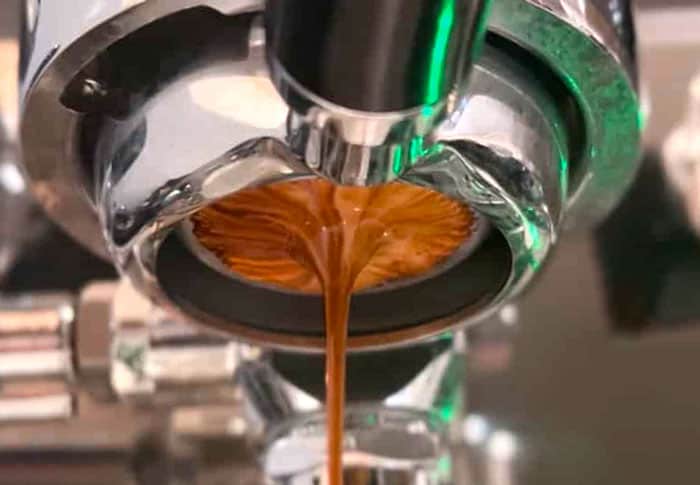
And now comes my favorite part, watching the extraction process as the water flows through those freshly ground beans.
Here are some things you want to watch out for:
- Keep an eye on the flow rate and how long it takes in total. If the shot time is too slow or too fast then we’ll have some adjusting to do later with our grind size maybe even dose adjustment so keep a note of how long each one takes (this will come in handy).
- If you have a bottomless portafilter like these, you can truly diagnose your puck and technique for channeling.
- Crema should form on freshly roasted and ground coffee beans. If not, read this.
At this point, you may be faced with too short or too long extraction times. If they are extreme (less than 20s or more than 40s), it’s better to just dump the coffee and adjust your grind size.
I know this seems like a waste, but it shouldn’t take more than 3 shots to dial in your espresso once you are familiar with all the steps.
Otherwise, on to the next step, the one you’ve been working towards all this time.
Step 6: Analyze Taste
Once the espresso has been extracted, it’s time to sample your creation and analyze your perfect shot.
It’s important that you take notes and pay close attention as each extraction will be unique depending on all of our variables – beans, dose, grind size, etc.
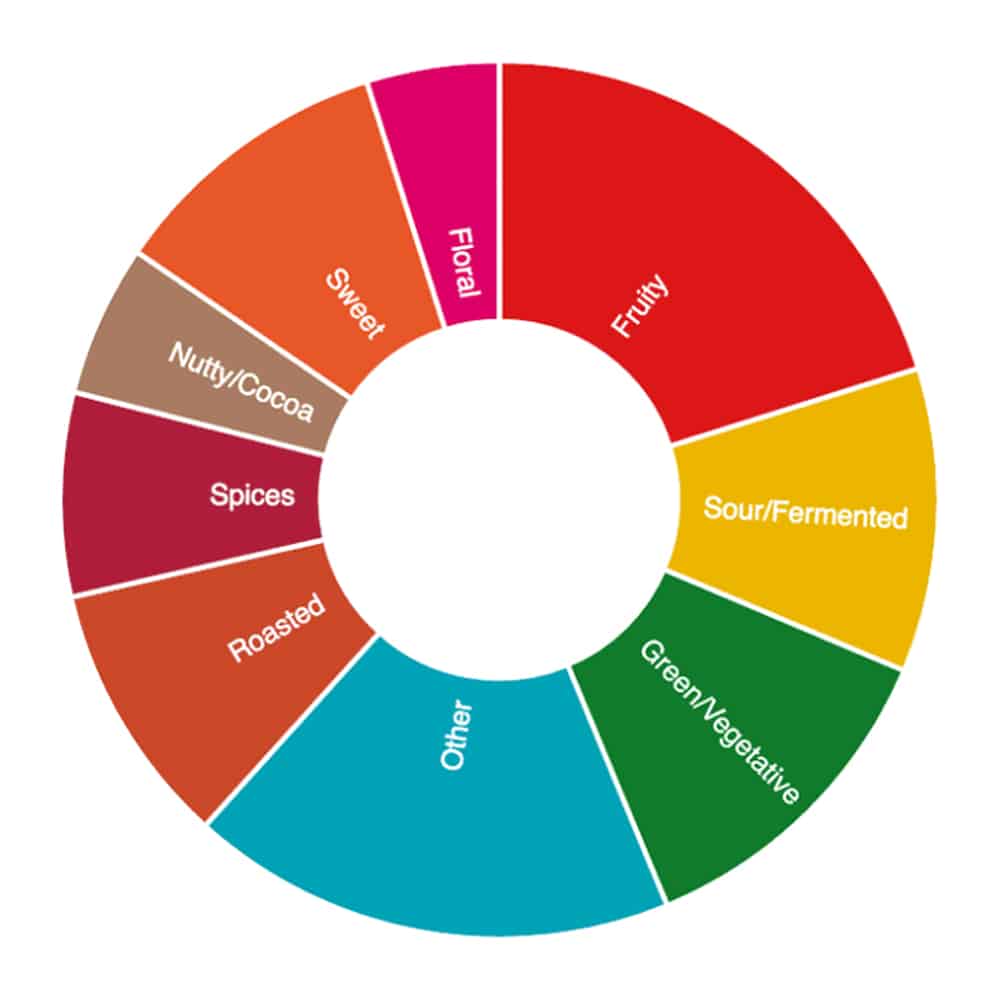
Learning how to consume espresso to truly appreciate it also requires a bit of knowledge and skill.
- I recommend starting by stirring the beverage lightly, and
- taking in the aromas.
- Next, taking a sip or two from the cup so that you can really focus in on what flavors are present and how they interact with one another,
- then slowly exhale through your nose, so you can taste and smell it all.
Here is a detailed guide to coffee tasting and the coffee wheel if you are interested.
Now back to your espresso.
- Do any particular aspects stand out?
- Is there something missing?
Taking these kinds of observations into account helps hone your skills for future dialings-in. With practice (and lots of caffeine), you’ll soon become an expert barista in no time at all – trust me.
How to Dial in Espresso at Home – Pro Barista’s Guide
Ingredients
- 18 g coffee beans
Instructions
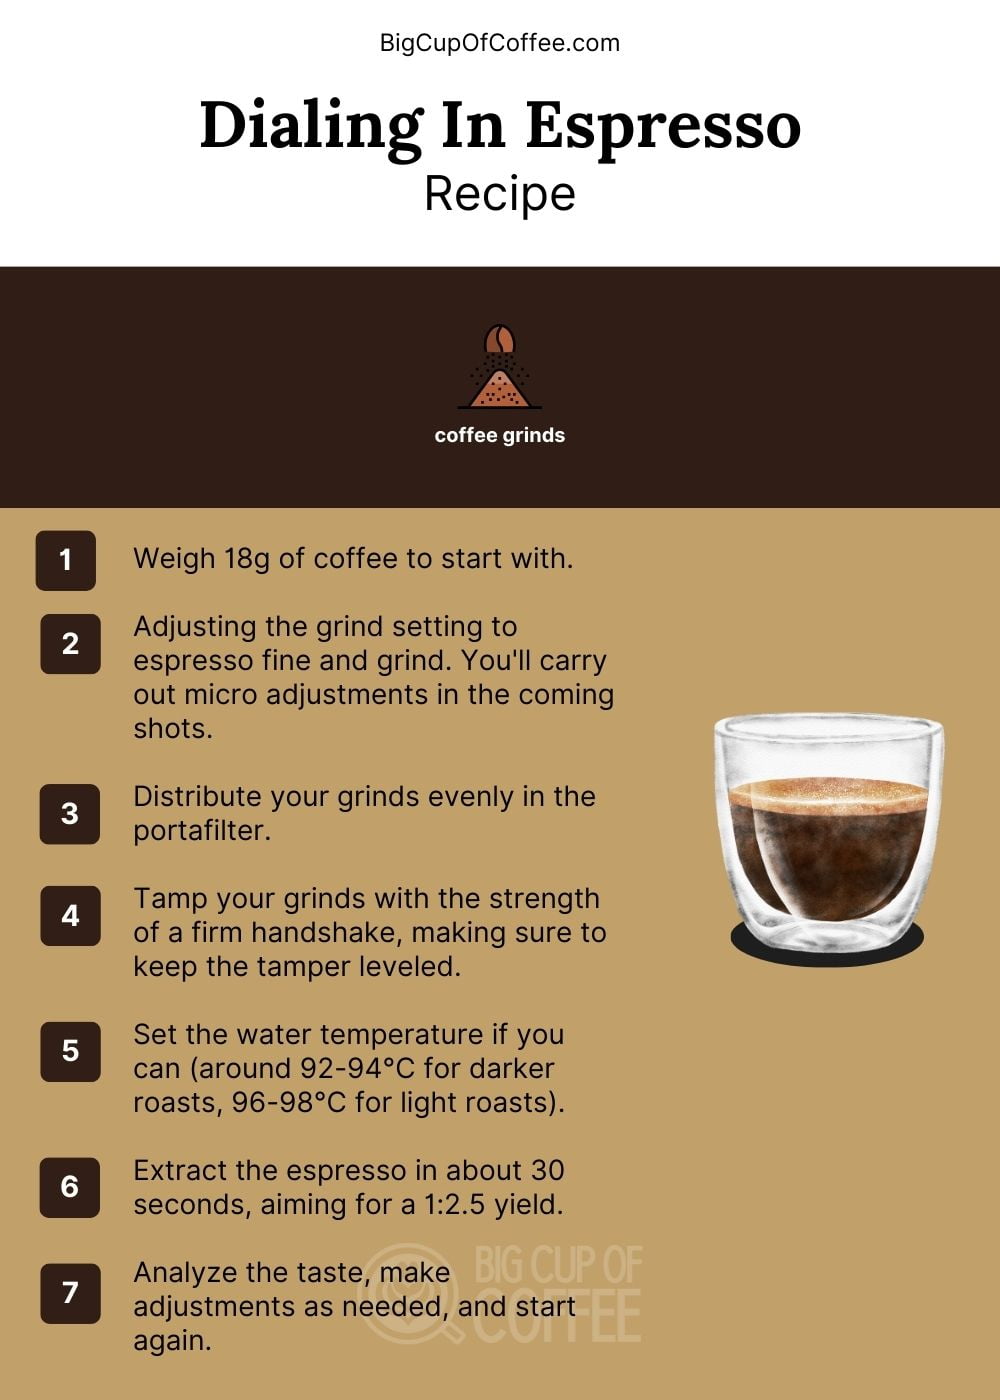
- Weigh 18g of coffee to start with.
- Adjusting the grind setting to espresso fine and grind. You'll carry out micro adjustments in the coming shots.
- Distribute your grinds evenly in the portafilter.
- Tamp your grinds with the strength of a firm handshake, making sure to keep the tamper leveled.
- Set the water temperature if you can (around 92-94°C for darker roasts, 96-98°C for light roasts).
- Extract the espresso in about 30 seconds, aiming for a 1:2.5 yield.
- Analyze the taste, make adjustments as needed, and start again.
Video
Notes
Troubleshooting Common Issues With Espresso Dialing In
Troubleshooting a bad-tasting espresso can be tricky, unless you are reading this guide. And you are, so good for you!
As a barista, I have wasted countless cups of coffee trying to perfect the art of dialing in – and trust me when I say that it takes patience.
The most common problems involve
- under-extraction,
- over-extraction,
- poorly ground beans,
- uneven tamping,
- yield.
When trying to fix each, the golden rule is to modify just one parameter at a time, so you know what effect it had.
Underextraction
Under extraction occurs when espresso is brewed too quickly, and as a result, essential oils present in the coffee beans are not extracted properly.
Signs of under-extracted espresso are:
- Unbalanced tastes
- Sourness
- Too fast flow
- Weak, thin body
- Lacking sweetness
This can happen due to any number of reasons such as too low dose, incorrect grind size, uneven grounds, resulting in an insufficient amount of time for extraction.
The key here is to lengthen your shot duration so that more flavor compounds from the beans get pulled through into your cup. You can do this with a coarser grind size, larger dose, or better tamping technique.
Overextraction
Overextraction is an issue many baristas experience, especially when first starting out.
Signs of over-extracted espresso are:
- Your espresso flows very slowly, or barely drips
- Brew time is over 35 seconds
- Bitter taste
- Dark spots on crema
To avoid this, try adjusting either one of three variables: extraction time, tamping pressure, or finer grind size.
Poorly Ground Coffee
One of the most important components to dialing in espresso is getting your grind right.
- If you’re grinding too coarsely, it can lead to under extraction and a weak cup of coffee with little flavor or body.
- On the other hand, if you are grinding too finely then over-extraction will occur creating an overly bitter brew that loses its complexity and depth of flavors.
To avoid these issues from occurring take note when adjusting your grinder settings:
- Grind finer for more extraction if your flow rate was too fast
- Grind coarser for less extraction if you choked your puck
You need to change grind size with each new batch of beans, as they will grind differently based on roast type, roast date, and how they were packaged and kept.
Uneven Tamping
Tamping is one of the trickiest things to master. You want the pressure and angle consistent throughout, otherwise each cup will be different, and all your tweaking will be in vain.
Personally, I find that using my arm as opposed to just my wrist gives me much more control over how hard or soft I’m tamping. This is something that takes some practice but makes a huge difference if done correctly.
If this still proves too challenging for you though then why not invest in an adjustable tamper? With these babies they basically do the job for you, so worrying about evenness becomes less of a concern.
Yield
Staying within the ideal espresso brew ratios of 1:2 to 1:3, you should aim to achieve your desired yield in around 25-30 seconds.
For example, if I’m using 16g of coffee grounds and aiming for a 1:3 ratio, I would expect a 48g yield in around 27-30 seconds.
- If the yield is achieved slower, I would want a faster flow rate, so I would make the grind a little coarser.
- If the 48g yield finishes too quickly, I could restrict the flow rate by either grinding finer, or possibly using a bit more coffee grinds. Not both though, you only want to change one thing at a time.
If you want a longer cup, make an Americano or a proper lungo instead of just letting the espresso run over 30 seconds.
Tips To Improve Your Espresso Dialing In
So you’ve got the basics of espresso dialing in down, and know how to solve some basic problems. Good job!
Now it’s time to get more specific and improve your technique for that perfect cup. Here are some tips I’ve learned over my years as a barista from advice shared with me, trial-and-error experiences, or just general know-how passed on through the generations…
Experiment With Different Grind Sizes
If there is one thing you can do immediately to bring out deeper flavors in an espresso shot – this would be it.
- Make sure all settings stay constant except for changing the size of your coffee beans when grinding them.
- You might find that switching between two very small changes (say 2 clicks) will make massive differences especially once brewed.
- Almost every type of bean requires its own unique “grind recipe”.
Adjust the Coffee Dose
Adjusting the coffee dose is one of the quickest and most straightforward ways to dial in your espresso. This involves adjusting how much coffee you use for each shot, expressed as a weight measurement (i.e 17 g).
I like to start with 16 g and go higher from there.
Think about it this way:
- If my shots are tasting too weak or sour, then increase the amount of grounds used;
- But if there’s an overwhelming bitterness that sticks around after drinking, reduce them.
Use Quality Beans
Quality beans are an absolute must-have if you want a perfect espresso. Freshly roasted coffee with just enough time for rest and degassing gives us all those desirable flavor characteristics we love without any nasty flavors coming through.
Coffee beans are best 10-30 days after roasting. You might not think this matters but trust me when I say, it makes such a huge difference.
Whenever possible, buy your whole bean coffees from local roasters so you know what’s going into making each batch. But with that said, no two batches will be alike. Even small changes in farm growing conditions could change things significantly year on year.
All these tiny details matter when trying to achieve consistently good espressos every single day that you can enjoy with a glass of sparkling water.
Conclusion
After reading through this giga article, you should be familiar with all of the concepts, steps, and techniques to make great espresso at home.
But it’s easier said than done.
Follow the steps outlined above, and if you run into any problems, please ask in the comments section below.