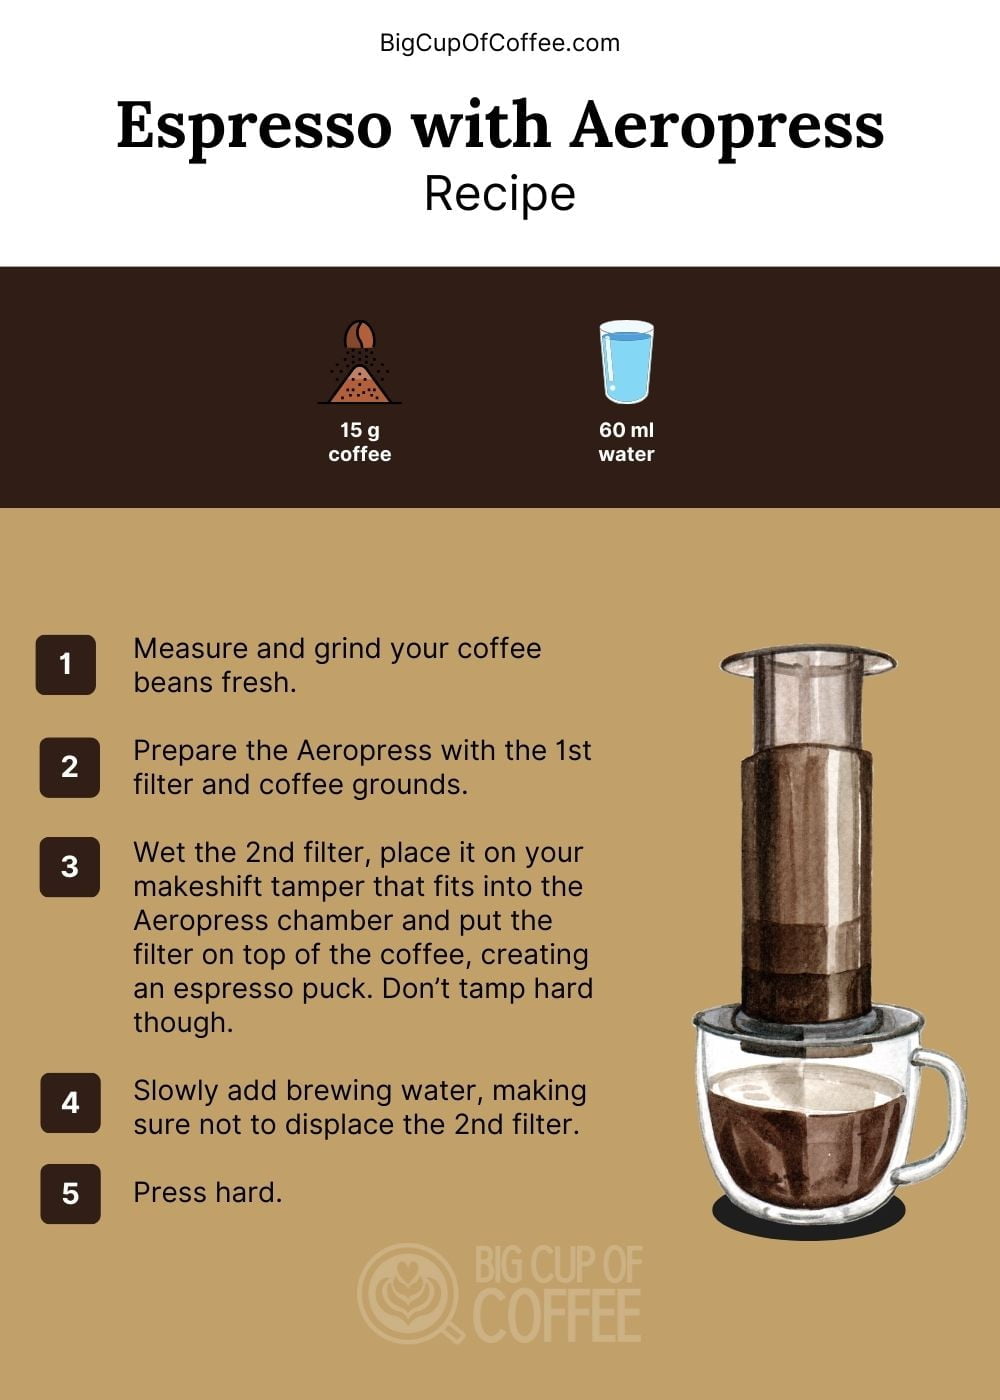
How to Make Espresso with Aeropress
Have you ever tried making coffee at home using an Aeropress coffee maker? If not, you should try it because it makes a great cup of coffee.
You can also use Aeropress to make a decent espresso!
Sort of…
There are several recipes online, and after experimenting with a few, I think I’ve arrived at an Aeropress espresso recipe that is 90% similar to the real thing.
But first, a disclaimer.
Can an Aeropress make an authentic espresso?
Even though this recipe comes close, you cannot make a true espresso with an Aeropress. This is because the pressure required to emulsify the oils and extract all the flavor from coffee beans is much higher than what the Aeropress can produce.
An Aeropress can exert 0.7 bar pressure, while a professional espresso machine will use 9 bars of pressure to pull a shot of espresso. Not more, not less, as this study shows.
The lower pressure means that the flavor extracted by an Aeropress will be weaker, and the resulting beverage will have a different mouthfeel and consistency than a proper espresso.
But again, this recipe comes very close since I compensate for the negatives of the Aeropress with a bit more coffee, just the right amount of water, and a few other tricks of the trade.
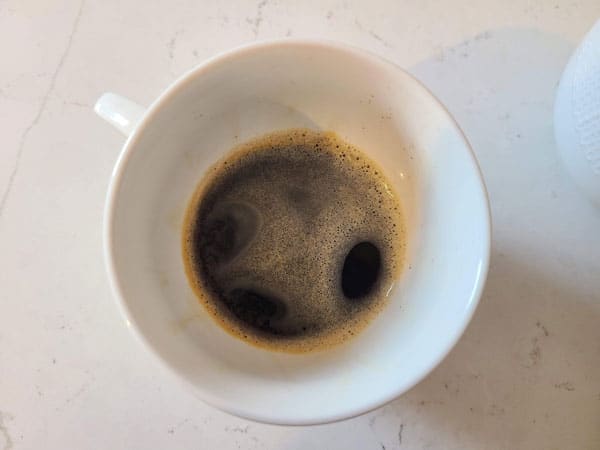
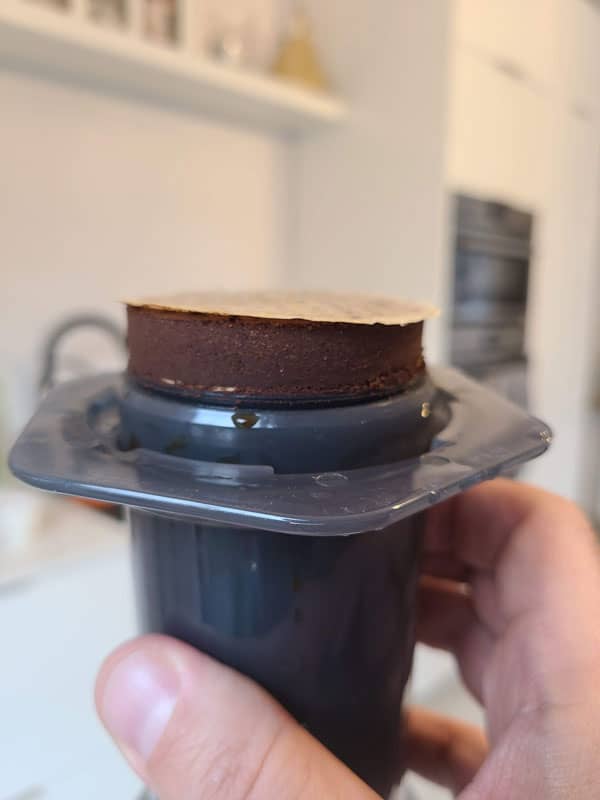
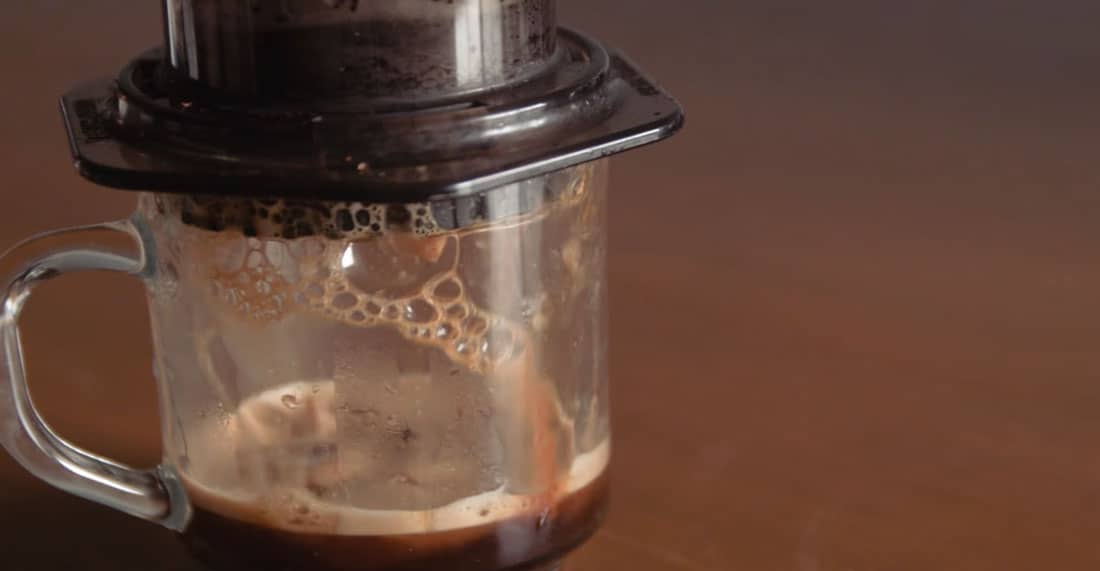
You won’t get much crema, as you can see, but it doesn’t really matter. Crema looks nice but doesn’t add anything special to the taste. In fact, it is removed in coffee cupping taste tests.
Taste of an Aeropress Espresso
As for a taste comparison, think of it like this:
- The taste of an espresso made with an espresso machine is rich and aromatic, with an intense flavor and thick body. A layer of fine crema tops the shot and lasts for a minute or so before decaying.
- An Aeropress espresso tastes delicious, balanced, and more concentrated than a regular Aeropress brew, but not as intense or thick as true espresso. It sometimes has a thin layer of crema resembling larger bubbles, but they generally pop quickly.
You don’t need crema to have great espresso, though, so don’t judge a book by its cover. The existence of crema is more impacted by variables related to the coffee bean itself, such as the roast date, roast level, varietal, and processing method. You can have a gorgeous crema on a terrible espresso, and no crema on a superb one.
The Aeropress is a fantastic coffee maker, and you will be surprised by the results, especially if you want to make a milk drink like a cappuccino or a latté. This recipe is perfect for those.
What You Need To Make Espresso With An Aeropress
You’ll need a few things to get started on your journey into making great espresso with an Aeropress.
- Aeropress
- 2 Aeropress filters (it’s best if one of them is metal)
- Burr coffee grinder capable of “almost” espresso grind
- 13-15g of quality medium-dark roast coffee beans
- Some kind of tamper that fits into the Aeropress chamber (a spice/pepper mill will do)
- Filtered water heated to 90°C
- Mug
- Scale
I want to touch on 3 of these in detail.
Why should you use a metal filter?
You should use a metal Aeropress filter to get as close as possible to a proper espresso. I’ve written about paper vs. metal filters before, and generally, I prefer paper filters, but not with this recipe.
A metal filter resembles the portafilter more in design and function as well. Compared to a paper filter, a small amount of micro-grounds and coffee oils pass through the fine mesh of the metal filter, which is exactly what you need in an espresso: a coffee with a rich aroma and a smooth, velvety texture while reducing the perceived acidity.
Best coffee bean roast level for Aeropress espresso
Dark roast coffee works best for espresso made with the Aeropress. The resulting beverage is dense, full-bodied, sweet, and not overly bitter.
Here are my favorite dark roast beans in 2024.
I’ve tried this recipe with light roast and medium roast specialty coffee, and quality dark roast single-origin Arabica. The dark roast beans were the best, by far.
Even though I like having light-roast espresso from proper espresso machines, it doesn’t turn out as you would expect from the Aeropress.
Grind size for an Aeropress espresso
You’ll need a fine grind to make an espresso with the Aeropress, but not quite as fine as if you were grinding for a real espresso maker. Don’t make it extra fine either, you won’t be able to push the water through.
You’ll need to use much more pressure on the plunger than you’re used to with Aeropress’s recommended medium-fine grind, because you need to push the water through a finer grind.
How to make an espresso with Aeropress
Here is the step-by-step walkthrough of my Aeropress espresso recipe.
This is a mesh of similar recipes I’ve found and tweaked.
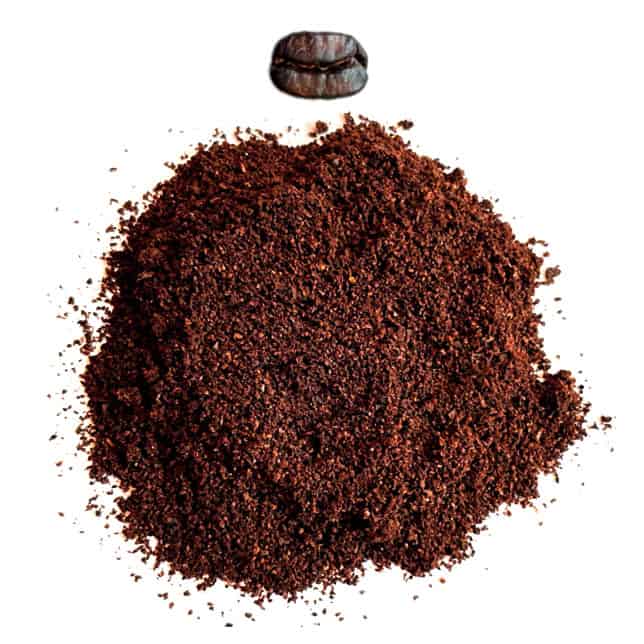
Step 1 – Measure and grind your coffee beans fresh
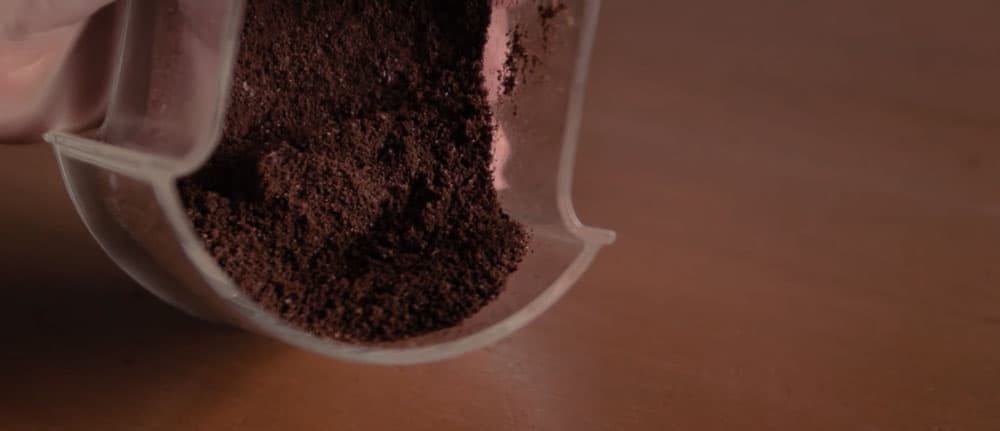
If you want outstanding coffee, you need to grind it yourself fresh. Freshly ground coffee beans taste better than pre-ground coffee beans since they are more aromatic and have more flavor. You can buy whole-bean coffee from a local shop and grind it at home.
As always, I recommend using a burr coffee grinder. This type of grinder produces a consistent grind every time, and it’s easy to clean.
Grind 13 to 15g of whole coffee beans. I personally use 14g with this recipe.
Step 2 – Prepare the Aeropress with the 1st filter and coffee grounds
We’ll use a modified version of the standard brewing method, not the inverted method.
Pre-soak a paper Aeropress filter as you would normally.
If you use a metal filter, you should still run some hot water through it to warm up the coffee maker.
Add the freshly ground coffee into the chamber, and shake it slightly to level the grounds.
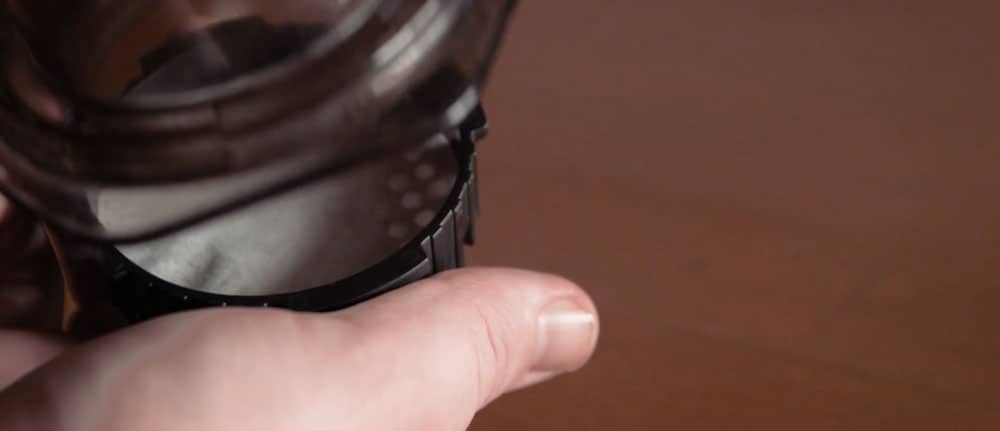
Step 3 – Wet the 2nd filter, place it on your “tamper”, and create an espresso puck
Here is where things get very different.
- You’ll want to wet your 2nd filter and place it onto your improvised tamper.
- Push this filter down into the Aeropress chamber until it reaches your coffee grounds.
- Make sure your grind is still level, and tamp it down to create an espresso-like puck in a portafilter. Don’t tamp it down too hard though, since you won’t be able to press the water through it. You’re just aiming to level out the coffee puck so it stays in place when you press down on the plunger.
- Pull the “tamper” out of the chamber with a slight twisting motion, leaving the 2nd filter on the puck.
Step 4 – Slowly add brewing water
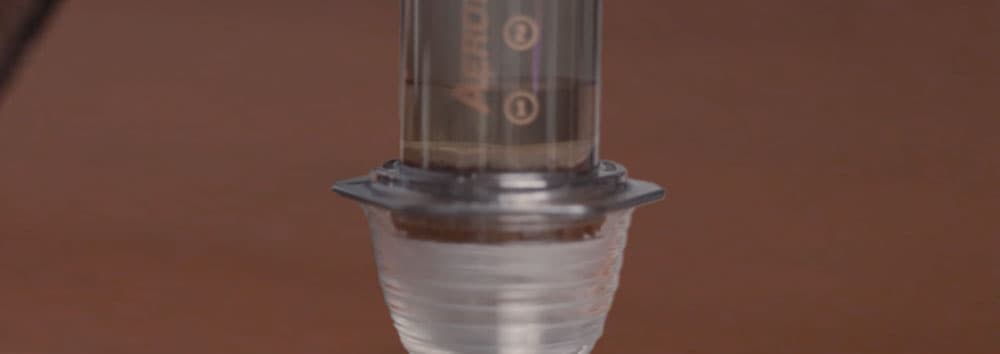
Water temperature is an essential factor in making coffee. You are aiming for 90°C water, which you can achieve by leaving boiling water to cool for about 1-2 minutes.
Now you’ll pour hot water into the brew chamber.
If you don’t have a coffee scale to measure the water as you pour it into the Aeropress chamber, you should fill it to just above the top of the circled 1.
Slowly (!!!) pour 55-60g of water into the cylinder. If you pour too fast, the water will displace the 2nd filter.
You’ll notice that there is no dripping! The water can’t get through the coffee puck without step 5.
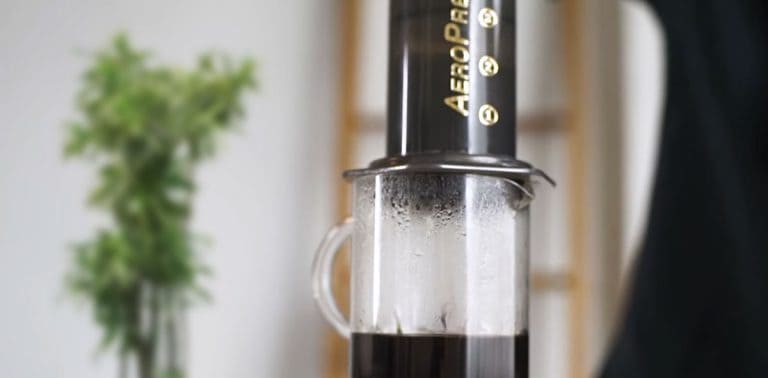
Step 5 – Press hard
There is NO brew time involved with this recipe.
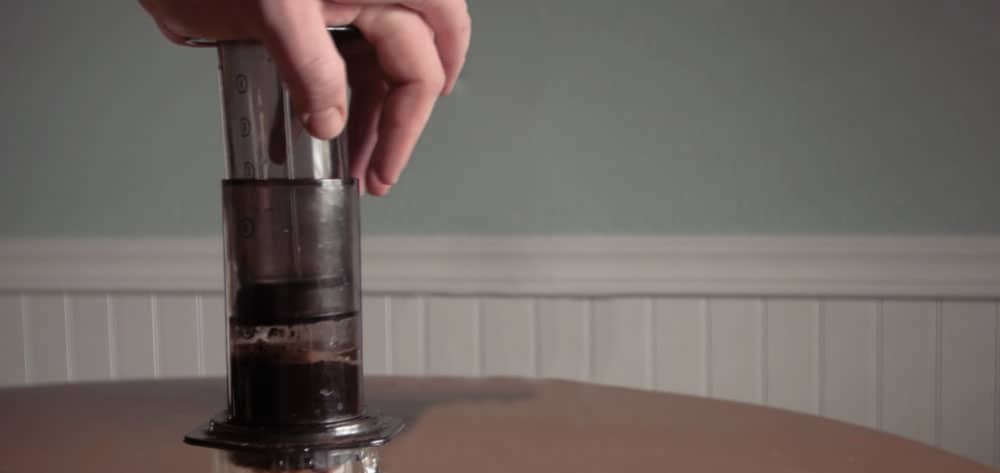
Take the Aeropress off of your scale if you used one, put the cylinder into the chamber, and press down hard and quicker than you normally would with an Aeropress.
Try to make the motion even, it should only last about 5-10 seconds, instead of the 20+ seconds you use with the standard Aeropress method.
As you push down, you are likely to get stuck about 3/4 of the way through. No problem, you’ll see that the liquid is slowly being forced through the coffee puck. Keep applying the pressure. Press all the way down, until you reach your coffee puck and compress it.
When you finish and empty your Aeropress, you’ll notice that you created a portafilter-style coffee puck. Good job!
Try, try again
I have to admit, the first time I tried making espresso with my Aeropress, I failed. What happened?
The plunger was super hard to press, and it just jumped back up when I didn’t apply pressure. No water was going through the coffee.
Two things went wrong:
- I ground too fine.
- I applied way too much pressure when creating the puck, like I was used to in a portafilter. An espresso machine uses 9 bars of pressure, but an Aeropress maxes out at around 1 bar when pushing water through the coffee.
I didn’t want to waste my coffee grinds, so I opted to take the top filter off with a fork, break up the puck, stir it a bit, and push. The result wasn’t too good, so I made a latte out of it.
But learning from the experience, next time I used a slightly coarser grind setting, and didn’t apply pressure on my “tamper”. This fixed the problem.
Espresso with Aeropress
Ingredients
- 15 g coffee beans
- 60 g filtered water
Instructions
- Measure and grind your coffee beans fresh.
- Prepare the Aeropress with the 1st filter and coffee grounds.
- Wet the 2nd filter, place it on your makeshift tamper that fits into the Aeropress chamber and put the filter on top of the coffee, creating an espresso puck. Don’t tamp hard though.
- Slowly add brewing water, making sure not to displace the filter.
- Press hard.
Video
Notes
- Do not grind as fine as you would for an espresso machine, it will clog the Aeropress.
- Push down hard, finishing the plunge in 5-10 seconds.
Tips for making a good espresso with an Aeropress
If you follow the step-by-step instructions above, you should have a pretty good espresso in the end.
Here are some more tips to help along the way:
- Use the best quality beans you can. I use light roast nowadays.
- Use a burr grinder, aiming for a fine grind
- Push down hard on the cylinder
- Use a metal filter
- Try the Fellow Prismo filter, it is supposed to create more pressure.
And that’s all there is to it, you have an Aeropress Espresso. You can drink it as is, or use it to make any of your favorite coffee drinks. If you’ve enjoyed this recipe, you can also make yourself an iced AeroPress coffee and an ultra-fast AeroPress cold brew.
Enjoy, and please let me know how it turns out for you in a comment!


Long-time barista here. I appreciate the attention to detail in your Aeropress espresso approach, especially with the emphasis on compensating for the Aeropress’s lower pressure. However, I must point out that crema is not merely aesthetic; it can indicate the freshness and quality of the coffee beans. That being said, the quality of the drink itself can indeed surpass the importance of crema. Always a pleasure to discuss coffee with fellow enthusiasts.
Interesting read. But why is the pressure in bars important for espresso, and how exactly does the Aeropress compensate for the lack of it? Wanted to get a bit more clarity on this point because I’m thinking of trying out this recipe for my Twitch streaming sessions when I need that extra kick.
The Aeropress only gets up to around 1 bar of pressure, it can’t compare to the 9 bars that are best for an espresso. So your Aeropress espresso will never be a true espresso, just a good fake 😉
Tom, your recipe is spot-on. I tried making espresso with a metal filter as suggested, and it did seem to enhance the body of the coffee. What do you think about experimenting with different bean varietals in this process, or is the roast level more crucial for the results?
Everything is worth a try 🙂
Wow, I never thought I’d be able to come close to an espresso with my Aeropress at home. This article was a game-changer—turns out, it’s all in the grind size and pressure. I followed your method this morning and, while it’s not quite the café shot black, it’s great with milk drinks, my homemade latte has never tasted better. Thank you, Tom, for these invaluable tips.
I followed your recipe and made an espressowith my Aeropress, and it was fantastic, especially for a non-espresso machine method. Wondering how crucial is the step of using two filters vs. one? What difference does it make in the final taste? Really curious to figure out how I can fine-tune this process.
Got a question for Tom – Can I use a regular tamper to form the Aeropress espresso puck, or is there a specific size I should be looking for? Your step-by-step guide seems easy to follow, but I want to make sure I have the right equipment before I start experimenting.
You can use anything you have at home, I use a longer spice grinder, since it reaches down easily.