
How to use an Aeropress for great coffee – Instructions
The Aeropress is very popular in 2024 among coffee aficionados who love experimenting with different brewing methods.
In this article, I’ll tell you everything you need to know about the Aeropress, from how it works, to the right recipe for an exceptional taste experience.
You’ll soon conjure up aromatic coffee in a class of its own with your Aeropress.
Let’s do this!
What is an Aeropress, and how does it work?
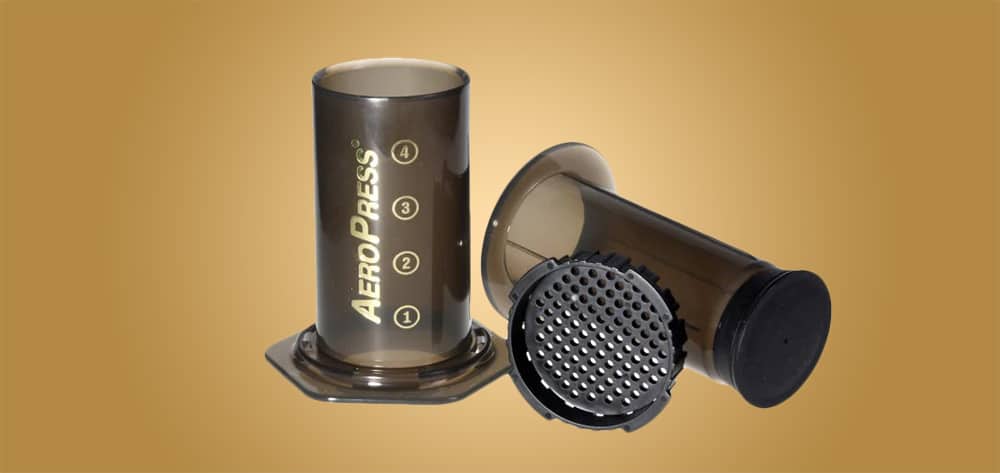
The Aeropress coffee maker is a unique and affordable way to make coffee. It uses a piston to force hot water through coffee grounds, yielding a rich and full-flavored cup of coffee. The Aeropress is easy to use and clean, perfect for making coffee at home or on the go.
It was invented by Alan Adler, the founder of Aerobie, the same company that created the Guinness World Record holding Superdisc (a frisbee that can fly 1,333 feet).
Now let’s look at how the Aeropress works.
It consists of three main parts:
- Brew chamber (cylinder),
- Press plunger
- Filter cap
Plus, it has several other accessories:
- the scoop
- stirring rod
- paper filters
- filter holder
- funnel
Using it is simple; this is how it works in a nutshell:
You place a filter into the filter holder and screw it onto the brewing cylinder. The cylinder is placed on a cup or a pot and filled with freshly ground coffee. Pour water into the brewing chamber, put the plunger into the cylinder, wait a bit, and press the plunger down. The pressure you exert forces the water to flow through the coffee grounds giving you a cup of Aeropress coffee.
Step-by-step instructions on brewing great Aeropress coffee
Aeropress gives you basic instructions on using the product, but I have modified it a bit to make it better. The recipe below is my version of the “standard” method (there is also another way of using it called the inverted method as detailed here).
To make an Aeropress cup of coffee, you will need:
- AeroPress
- Aeropress filter
- Burr grinder
- 17 g freshly ground coffee (I recommend light-medium roast, but that is up to your taste)
- Gooseneck electric water kettle is best, but optional
- Digital scale
- A sturdy cup
Here are the exact steps to making Aeropress coffee with the “original” standard method. Warning, you’ll crave it repeatedly.
Step 1 – Boil water
Heat about 230 ml of water to 90-95° C for light roasts, or 85-90° C for dark roasts.
If you have an electric kettle, great!
If not, simply boil the water, then cool for about 1-2 minutes. The water should reach about 90° C.
Step 2 – Wet the paper filter
Unscrew the filter holder and place the filter on the strainer.
Then wet the filter with a bit of the hot water you prepared in Step 1. This process eliminates the taste of paper, which could interfere with the aroma of the finished coffee.
Screw the filter holder into the brewing cylinder.
Step 3 – Grind coffee

Next up is to prepare your coffee grounds. If you’re looking for the right coffee beans for your brews, check out our list of the best coffee beans for the AeroPress method.
I’ve had consistently good results using 17g of a fine – medium coffee grind on the Aeropress. One heaping AeroPress scoop is around 15 grams of coffee, so I use slightly more.
It will be too hard to press down on the plunger if it is too fine. Too coarse, and you will get weak coffee.
Pour your coffee ground into the cylinder, and move it around a bit to level it out.
Step 4 – Slowly add the water
Place the cylinder onto a sturdy coffee mug, and SLOWLY pour the 90°C water evenly onto the ground coffee in the brewing chamber. The best way to do this is with a drip kettle, as it allows for more control
Your water should be enough to reach the circled 4 on the cylinder.
Step 5 – Stir
You can use the Aeropress-supplied stirring tool or a teaspoon to stir in a circular motion and gently break up any lumps of coffee grounds that may have formed.
Step 6 – Insert plunger and brew for 30-50 seconds
Gently insert the plunger into the cylinder and let the coffee bloom for 30-50 seconds.
You insert the plunger to create negative pressure, so the coffee doesn’t start dripping down into your cup.
Don’t push down on it just yet, though. Let the coffee bloom. I set a stopwatch and wait for 40 seconds.
Step 7 – Press
The process finally comes, which gives the AeroPress its name: pressing down on the plunger nice and slow.
Here are some tips for this:
- Use even downward pressure as you force the plunger down
- It should take 15-20 seconds
- Stop when the plunger reaches the coffee grounds at the bottom of the cylinder
And that is how you make great coffee with an Aeropress.
You should try various other Aeropress coffee recipes from this page, including the fast Aeropress cold brew recipe.
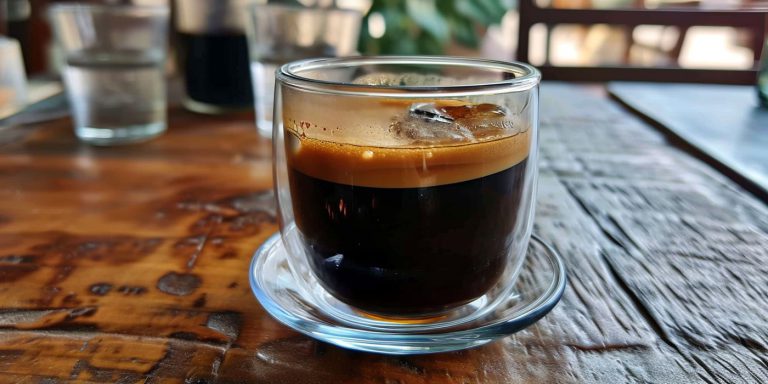
What does Aeropress coffee taste like, and why?
Aeropress coffee is distinctly different from drip coffees and espresso. What does it taste like?
Coffee made with the AeroPress has less bitterness and more aroma than coffee made with the French Press or filter coffee maker. The pressure from the pressurized cylinder improves extraction and gives your cup of coffee a strong flavor. The paper filter in the Aeropress stops any oil and sediment from getting in the cup, resulting in a clean taste with well-defined flavor notes.
The recipe I gave you above is a great one in my opinion, but there is no single set of instructions for making coffee. Your taste decides how much coffee with which grind makes the perfect AeroPress coffee for you.
What to do if your Aeropress coffee is too bitter or strong?
If the coffee tastes too bitter, these are typically the problem:
- You may have ground the coffee too finely.
- Your water was too hot.
- Your brew time was too long, and more bitter substances dissolved.
- Dark roasts can be overly bitter.
Fix these one by one, and experiment.
What to do if the coffee from the Aeropress is too sour or doesn’t have enough body?
To prevent a sour coffee with little body, follow these tips:
- Use only freshly roasted and freshly ground coffee.
- Make sure your coffee grinds are not too coarse.
- Don’t let the water get too cold before extraction.
- Use enough coffee grinds.
- Lengthen your extraction time.
Also, if your coffee has a papery aftertaste, make sure you pre-soak the filter properly. You might even consider using a metal filter, although I prefer the paper ones.
How to clean an Aeropress after use?
Great news, cleaning your Aeropress is super easy. Much easier than a French press, for example.
Here are the steps you’ll want to take to clean your Aeropress and keep it working better for longer.
- Pull the plunger out by about 1 cm, this helps avoid dripping.
- Unscrew the filter cap and knock out the filter and used coffee grounds into the trash.
- Pull the plunger out, so you’re left with the 3 main parts disassembled: filter, plunger, chamber.
- Rinse each part with warm water.
- Let them dry, and put them away disassembled. Don’t store the Aeropress with the plunger in the cylinder, it’s bad for the silicone seal.
Since all parts are made of plastic, they can be easily washed with clean water and dried.
AeroPress is also dishwasher-safe, although I don’t recommend doing this too often. Here is an article on cleaning the Aeropress in a dishwasher.
FAQ
Here are all the questions you may have about the Aeropress, but if there is anything else, please let me know in a comment below.
The Aeropress can only hold 250ml of water, which is about 1 cup of coffee. However, if you make a stronger coffee by adding more coffee grind, you can make 2 cups by diluting them with water after brewing.
No, the standard Aeropress recipe is not like an espresso. It is more like filtered coffee. However, you can use the Aeropress to make an “almost” espresso with this recipe.
A leveled Aeropress scoop holds 16.5g of ground coffee.
Both the standard and inverted methods in AeroPress brewing have their own pros and cons. The better method depends on your preferences but I recommend that you master the standard method first. Check out my detailed comparison between standard and inverted AeroPress methods.
Yes. There are three other variants of the AeroPress you can purchase:
– AeroPress Go: A smaller and more portable AeroPress that can brew 8 oz of coffee instead of 10 oz.
– AeroPress Clear: Similar to the standard AeroPress except for its transparent and more durable Tritan plastic construction.
– AeroPress XL: This variant is 1/3 taller and has wider inner and outer diameters than the original AeroPress. It also comes with a 20 oz Tritan plastic carafe.


Your advice about adjusting water temperature according to the roast is spot on; as an experienced barista, I can’t emphasize enough how this affects extraction. I would add that the grind size is equally crucial – a slightly coarser grind works best for me to prevent over-extraction. Remember, the Aeropress is forgiving, but small tweaks can lead to the perfect brew.
Hey, great read, but I got a bit tripped up about Step 2 – you mention pouring hot water on the filter to avoid paper taste, but can you reuse that water in the brew process, or should it be discarded? Wanting to ensure I get the perfect cup without wasting.
You just pour that water out.
After reading your article, I decided to give the Aeropress another try, and wow, what a difference. The visual descriptions of each step were spot-on. It’s a hands on process to say the least, but I’m finding it a lot of fun.
I appreciated the step-by-step breakdown, but I’m curious about the inverted method you mentioned. Could you possibly elaborate on that or point me towards some resources? Always looking to improve my coffee game.
Sure, here is an article I wrote on the inverted method, where I go into not just the steps, but also how it compares to the standard: https://bigcupofcoffee.com/aeropress-inverted-method-recipe/
This guide really clarified the Aeropress process for me – I’d been struggling with getting the water temperature right, and tip about cooling the boiled water for 1-2 minutes was a game-changer. It’s like everything finally fell into place, the boiling water was definitely overxtracting my coffee giving it a burnt taste. So grateful for this thorough walk-through, Tom.
I’m curious about the stirring step — you mention to stir,but I’m unsure about the technique. Should it be a gentle swirl or a more vigorous stir? I know agitation can really change the final taste, so any specific pointers would be super helpful.
The stirring should be nice and gentle, enough to get the grinds rotating.
Love the Aeropress for its simplicity and the rich coffee it produces. However, I sometimes find cleaning it to be a bit of a hassle, especially when traveling. Any tips for an efficient cleanup when you’re not at home?
Simply rinsing it with clean water for a few days is totally OK, and give it a deeper cleaning when you get back home.