How to Use a Coffee Percolator Over a Campfire While Camping
My favorite part when camping is the mornings spent in the glow of a new dawn, holding a heart-warming cup of coffee in my hand. But just like you probably have, I too grappled with brewing fresh coffee while camping under the open sky.
That was when I stumbled upon campfire percolators. Now you probably won’t have a campfire lit in the morning, but you can definitely enjoy a fresh cup in the late afternoon, and even save some coffee for the morning.
What is a Campfire Percolator?
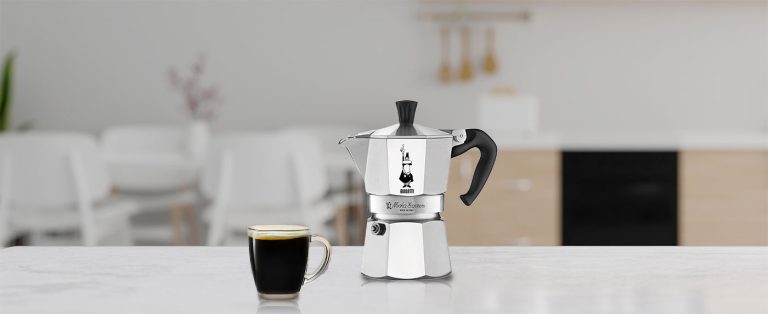
A percolator is a classic brewer most popularly used for camping and making coffee on a stovetop. You’ll find this method popular for its straightforwardness and utility. Put simply, it’s a handy coffee brewer that resembles a kettle. It is crafted from stainless steel or aluminum.
The first modern percolator was invented by the Parisian tinsmith Joseph-Henry-Marie Laurens in 1819 while the early 1900s saw the creation of electric percolators, making the process even more convenient for some.
You can use the percolator on a stovetop, but nowadays, I think it is the portable aspect that keeps this brewer alive. When I’m out camping, all I need are basic ingredients, a campfire, and my percolator and I can easily enjoy a daytime jolt or peaceful soother during serene nights.
Equipment & Ingredients for Camping Percolator Coffee
Here’s a list of everything you need to percolate your own coffee with a campfire.
- Percolator coffee pot: This is the main equipment needed for making coffee while camping. The percolator coffee pot has a basket and stem that hold the coffee grounds, allowing water to pass through them.
- Campfire: You will need a source of fire, such as a campfire or a stove, to heat up the water in the percolator and brew the coffee.
- Ground coffee: Use medium grind size coffee, and fill the basket in the percolator. The exact amount varies by percolator size, but as a general rule, you will use about 2 tablespoons of regular-grind coffee for each cup of water you use in the pot.
- Water: It’s best to use filtered water, but you may not have any when camping. I have even used super clear spring water that I knew was suitable for drinking from our guide
Step-by-Step Guide on How to Use a Camping Percolator
Using camping coffee percolators might seem intimidating at first, especially if you’ve gotten used to making coffee at home, but it’s actually really easy.
Here’s how to make coffee with your percolator and your fire.
1. Prepare your campfire.
- First, you want to make a decent campfire.
- You’ll want to have a hot bed of coals ready or you can also use a fire pit grate that you can put on top of your fire.
2. Fill the percolator pot with water.
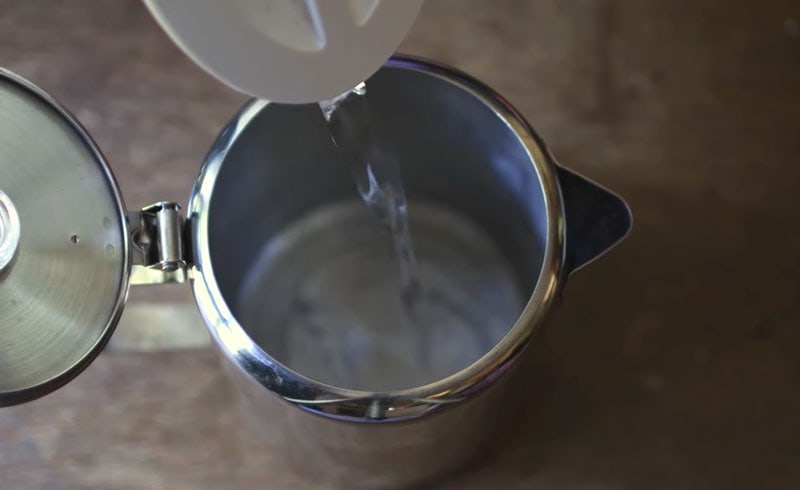
- Get your percolator and open it to remove the basket and stem.
- Fill the pot with water. In general, 2 cups of water will equal 1 mug of coffee. Percolators come in different sizes but most have a mark on the pot for the proper water level. If you don’t see one, fill it right below the spout.
- Take note of how many cups of water you used.
3. Add the ground coffee.
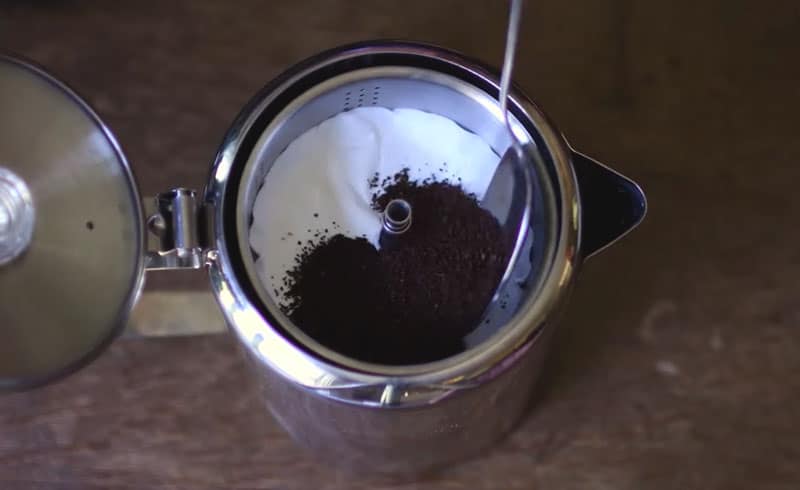
- Place the stem and basket inside.
- Pour medium-size coffee grounds into the basket. Use 1 tablespoon of coffee for every cup (236 ml) of water you have in the pot.
4. Put your percolator into the campfire.
- Put the lid back onto your percolator and place it on top of your fire pit grate or over the hot bed of coals.
- Now sit back and wait for the percolator to reach its boiling point.
5. After your coffee boils, move it to the edge of your campfire.
- As soon as it reaches its boiling point, carefully move the pot to the edge of the fire or heat source.
- This step allows for controlled brewing as percolation takes place slowly over time – around five to ten minutes.
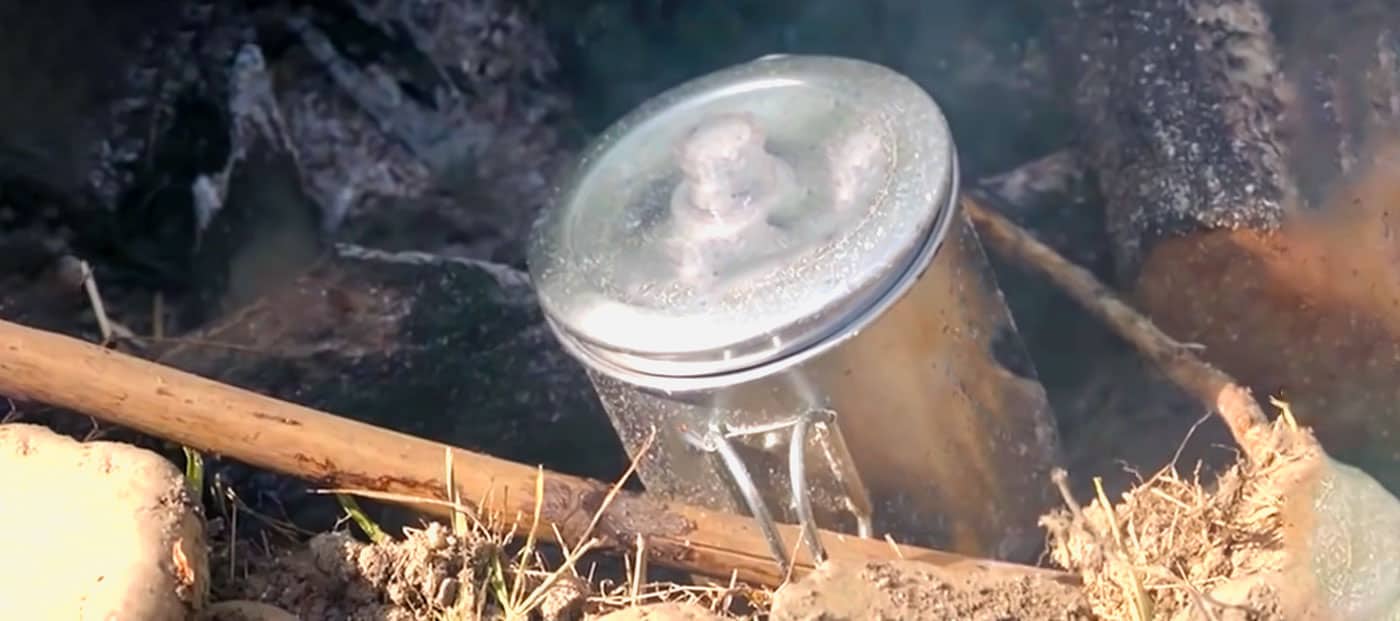
6. Wait until the percolation is complete.
- You’ll know your coffee is ready once you see the liquid coffee moving about inside your percolator’s glass knob.
- Carefully remove the percolator from your heat source. If the handle is too hot, use a pot holder or a piece of cloth.
7. Discard the used grounds and pour your coffee into a cup.
- Open the percolator and discard the used coffee grounds. You can just flick it to the ground since used coffee grounds can also serve as fertilizers.
- Pour the coffee into a cup and enjoy.
How to Use a Camping Coffee Percolator to Brew with Your Campfire
Ingredients
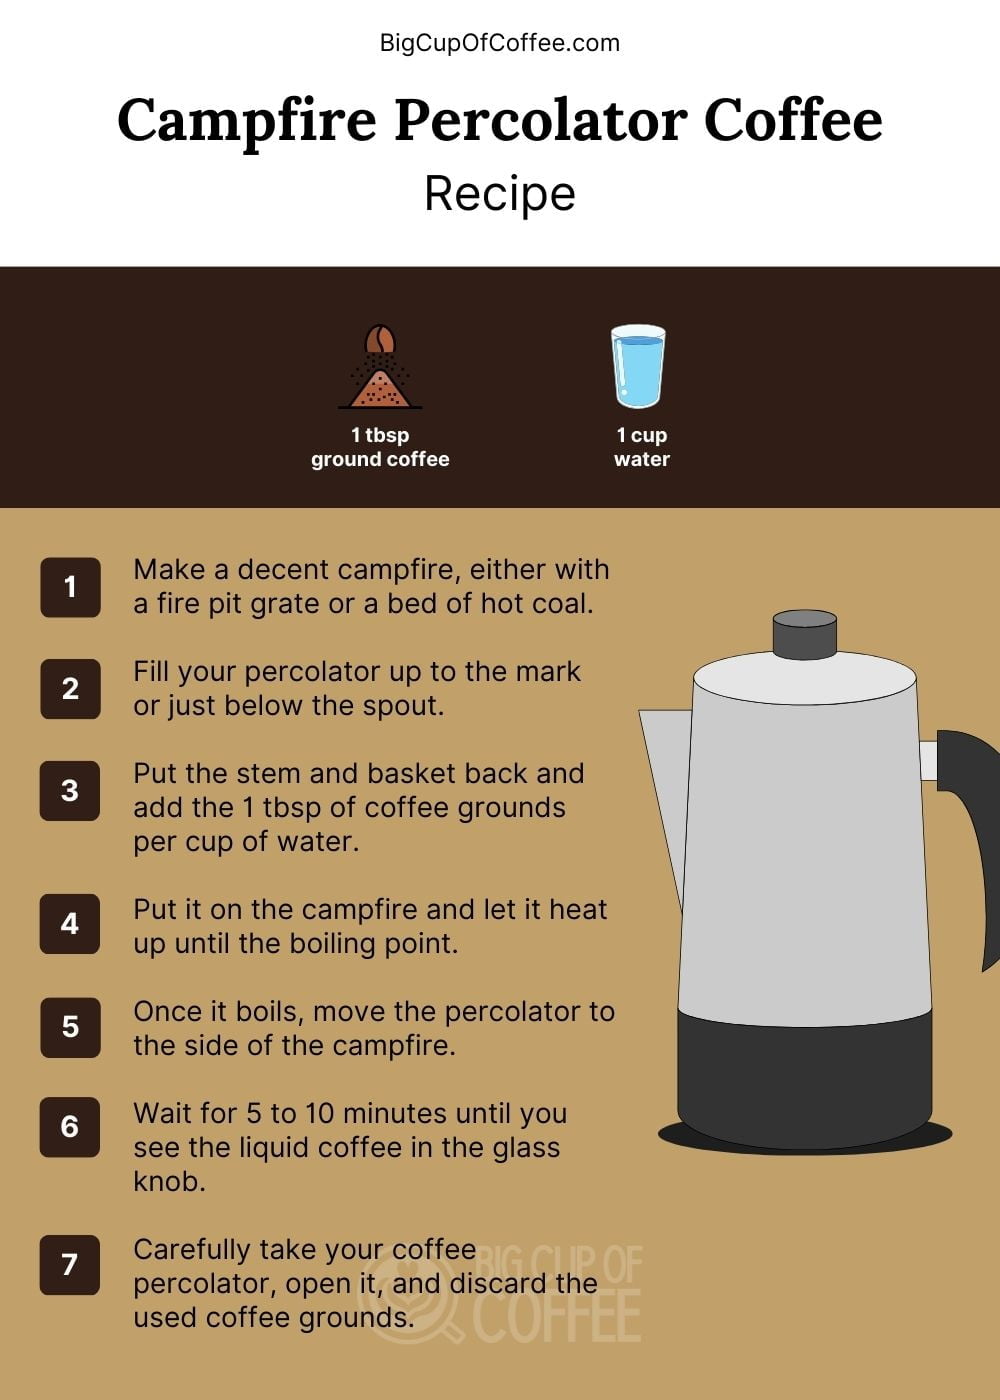
- 1 tbsp Ground coffee
- 1 cup Water
Instructions
- Make a decent campfire, either with a fire pit grate or a bed of hot coal.
- Fill your percolator up to the mark or just below the spout.
- Put the stem and basket back and add the 1 tbsp of coffee grounds per cup of water.
- Put it on the campfire and let it heat up until the boiling point.
- Once it boils, move the percolator to the side of the campfire.
- Wait for 5 to 10 minutes until you see the liquid coffee in the glass knob.
- Carefully take your coffee percolator, open it, and discard the used coffee grounds.
- Pour your coffee into a cup and enjoy.
Video
Notes
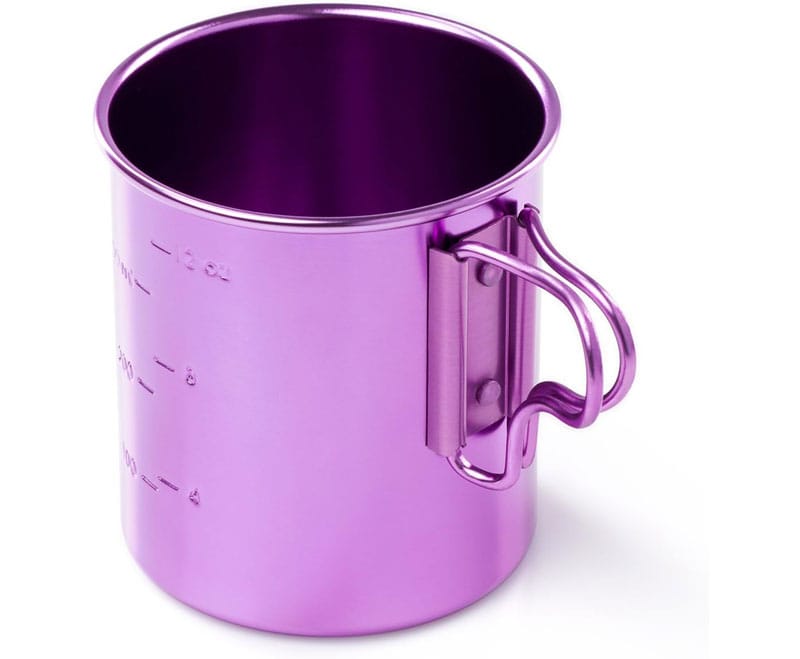
What kind of cup should you serve your percolator coffee in?
Any mug or cup with a handle should work for enjoying your percolator coffee. However, since you’re brewing outdoors, I recommend a stainless steel mug that’s portable and would not break inside your backpack.
How to Clean Your Camping Percolator
Keeping your coffee percolator squeaky clean plays a vital role in crafting the ideal cup of joe. Gradually, pesky little stains and unwanted residue begin to accumulate in your percolator, throwing off the flavors of your coffee.
To sustain top-notch quality and optimal flavor in your coffee, here’s a precise guide on maintaining your coffee percolator:
Step 1: Gather Your Supplies
Before you start cleaning, gather the necessary supplies. You’ll need baking soda, vinegar, dish soap, a sponge or cloth, a scrub brush (if required), water, and a clean towel.
Step 2: Clean the Percolator Body
For stovetop and camping percolators, ensure they have cooled down. Fill a basin or sink with warm water and add a few drops of dish soap. Use a sponge or cloth to wipe the interior of the percolator, removing any built-up grime. Rinse thoroughly with clean water until the water runs clear.
Step 3: Clean the Percolator Basket
For both electric and stovetop percolators, focus on cleaning the basket. It tends to collect oily residues quickly. Wipe the basket with a soapy sponge or cloth, paying extra attention to any stubborn stains. Rinse thoroughly with clean water.
Step 4: Scrub the Stem/Pump Base (if needed)
In stovetop percolators, the stem or perk tube and pump base can accumulate oils or residue. Use a soapy sponge or cloth to clean these areas, ensuring they are free from any build-up. Rinse with clean water.
Step 5: Wipe Down the Exterior
Using a damp cloth or sponge, wipe down the exterior of the percolator. Avoid using abrasive materials that may scratch the surface, especially for stainless steel percolators. Dry the exterior with a clean towel to restore its shine.
Step 6: Deep Clean with Baking Soda and Vinegar (Recommended every 1-2 months)
For a thorough clean, mix warm water with 2-3 tablespoons of baking soda inside your percolator. Allow the percolator to run a brewing cycle, ensuring the water and baking soda mixture agitates and cleans the interior. After the brewing cycle, let the water cool before emptying the percolator.
Next, fill the percolator with a mixture of equal parts white vinegar and water. Run another brewing cycle to descale and remove stubborn stains. Afterward, run a cycle with clean water to rinse out any remaining vinegar taste. Click here for other alternatives you can use for cleaning.
Step 7: Clean the Filter Basket (if needed)
If your filter basket requires additional cleaning, soak it in a solution of white vinegar and water for approximately 30 minutes. Rinse thoroughly with fresh water and allow it to air dry.
Step 8: Regular Maintenance
After every round of brewing, ensure you clean up your percolator promptly. Don’t let coffee remain and dry out inside the pot; throw away the used coffee right away. This stops any unwelcome odor or stains from seeping in. But be mindful of harming your percolator’s surfaces which might lead to damage.
Giving significant attention to regular cleaning sessions for your percolator will guarantee delicious brews and extend its durability. Walk through this guide faithfully, and you’ll relish a scrumptious and invigorating cup of joe every time.
Barista Tips on Using a Coffee Percolator
Here are some of my expert tips on percolating coffee:
- Use a reliable stainless steel percolator: Since you’re always exposing your percolator to the high temperatures of your fire, you want a reliable model. What I use is the GSI Outdoors Glacier stainless steel percolator which is a trusted brand for the durability of their products such as their coffee makers.
- You can use hot water when starting out: If you have an insulated flask with hot water, you can use the hot water to boil your water faster during brewing. That’s less waiting time to enjoy your cup of joe.
- Bring a grinder for a fresher brew: If you’re like me and you want your coffee fresh, then the outdoors shouldn’t stop you from enjoying one. Grind your fresh coffee beans right before brewing using a portable hand grinder. Check out our list of the best manual burr grinders in 2025.
Frequently Asked Questions (FAQs)
Here are some frequently asked questions about the campfire coffee percolator:
While both have similar parts and can be used interchangeably, you’ll find that campfire percolators are generally thicker and heavier than the stovetop percolator. This is because campfire percolators go directly over the coals of your campfire, unlike its stovetop counterpart which goes over the controlled fire of a stove.
Unlike campfire percolator coffee and other brewing methods, cowboy coffee doesn’t involve a filter. You brew the coarse coffee grounds in 200° Fahrenheit water (below the boiling point) and pour the drink after the coffee grounds have settled. You can also make this coffee in a percolator with the stem and basket removed.
Instead of percolators, you can also opt for brewers like Moka pots, AeroPress, and a steel French press when you go camping. Personally, I bring my trusty AeroPress Go when I’m in the great outdoors.
To Summarize
The joy of coffee really transcends beyond the confines of a café. Out there in the great outdoors, with nature all around, sipping a freshly brewed cup, it gets even greater.
It’s quite handy and effortless to brew with a percolator which makes it an ideal pick for camping trips. What’s more? There’s an inexplicable pleasure in observing your coffee slowly percolate, knowing that you are moments away from savoring a warm and soothing drink.
So why wait? Get your percolator into your camping bag, set yourself up near an open fire, and gear up to revel in the exquisite taste of camp-brewed coffee.


This article is such a good find. I give credit to your comprehensive guide for turning my chaotic coffee-making attempts into a streamlined process. By following your directions, even cleaning has become easier, which used to be the bane of my camping mornings.
This brings back memories of my grandfather’s old percolator—simple, yet so effective. However, he had his own technique for knowing when the coffee was done percolating which he swore by. He waited for the ‘perking’ sound to slow down to one perk every few seconds.
I was wondering about the cleanup process. You’ve outlined the steps for cleaning, but what’s your take on the best way to dispose of coffee grounds responsibly while camping? Keeping nature as undisturbed as possible is always a priority for me. Would love to hear your thoughts on this.
Just wanted to drop a comment and say massive thanks, Tom, your step-by-step guide was a godsend on my camping trip last week. My mornings used to be lackluster with mediocre instant coffee, but now, brewing with a percolator over the campfire is something else, the aroma of freshly percolated coffee amidst the pines is something else 🙂
Your article sparked my curiosity, Tom. I’ve always used a French press when camping, but your affection for the percolator technique has me tempted to try something new. How would you say the taste of percolator coffee compares to other methods like the aero press or drip coffee in the great outdoors?
I am not a fan of percolation to tell you the truth, you can’t really get consistent results with it due to the brewing method. I would stick with the french press for the campfire.
I’m a bit puzzled about the water ratio you’ve recommended for the percolator. Is the 2 tablespoons of coffee per cup of water a universal ratio, or should we adjust for personal taste? Last time I tried that ratio, my coffee turned out stronger than expected.