How to Properly Clean a Coffee Grinder: From Burr to Blades
Have you ever taken a sip of your morning brew only to be disappointed by a stale, funky taste? Chances are, your coffee grinder may be the culprit.
So, whether you’re the proud owner of a burr grinder or a trusty blade grinder, keeping it clean should be at the top of your to-do list.
In this article, I’ll show you the methods to clean and maintain your coffee grinders to tip-top shape and give you the pros and cons of the various cleaning methods.
So, let’s get right to it!
Why clean a coffee grinder?
Grinders are like sponges; they soak up coffee oils and old grinds and when not properly removed, stay inside them for a long time.
As time passes, these oils break down and start to go rancid. This naturally affects the grounds you’re brewing – often having noticeable oily aftertaste and smell differences once the coffee brews.
If that happens to you, it’s a definite cue to clean your coffee grinder to prevent a foul-tasting coffee in the future.
Cleaning your coffee grinder can get rid of the following:
- Performance Issues – Your coffee grinder isn’t built to last forever. Coffee dust and oil inside the grinder will eventually wear down the burr or the blade, adversely affecting your grinder’s performance and lifespan.
- Coffee Oils – When grinding coffee beans through the grinder, a natural layer of coffee oils can stick to the inner lining of the blade (and burr). Once these oils go stale due to oxidation, they’ll become rancid over time, affecting the taste and smell of your coffee.
- Leftover Coffee Residue – Old coffee particles and dust can collect and line the inside of the grinder. They can also contaminate and mix with new coffee grounds- affecting the taste of the final brew.
A good thing to note: dark-roast coffees contain more oil than lighter roasts – which will leave more oil if you prefer darker roasts.
That’s because the longer coffee beans are exposed to high temperatures (roasting), the more their structure begins to break down, leading to more presence of oils once roasted.
And the longer you wait to give your grinder a good cleaning, the larger the amount of coffee residue will be.
Whatever type you choose, keeping your grinder clean will prevent all the abovementioned problems and keep it in top shape.
Here are the ways to learn how to clean your grinder.
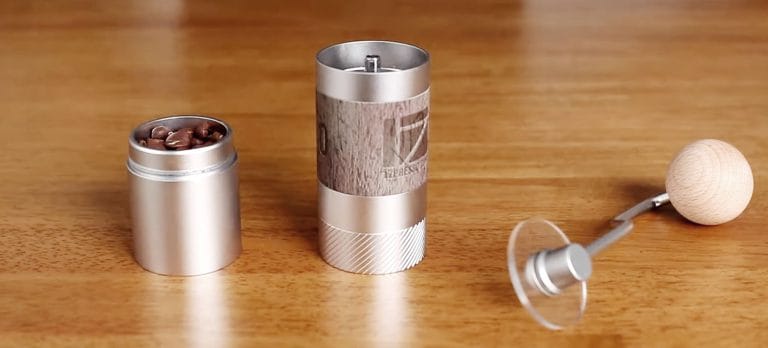
How to Clean a Burr Coffee Grinder
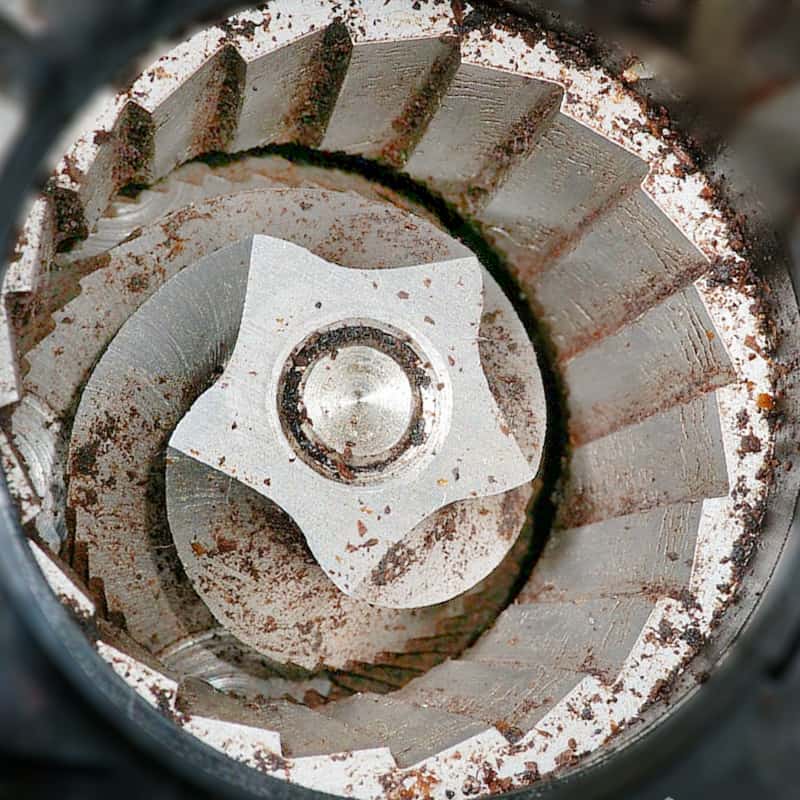
Burr grinders operate with two adjustable burrs: one stationary inner burr and one outer burr that spins to pulverize the beans. As the coffee beans move along the grinder, coffee oils, and residue will get stuck to the teeth and interior of your grinder.
Burr grinders are a pain in the neck to clean due to two reasons:
- Burrs made from metal can rust- even those made from stainless steel, given time. So cleaning it with soap and water is out of the question.
- Electric coffee grinders usually have burrs placed near the electric motor, making them impossible to clean with water.
Cleaning your grinder can happen in two ways:
- Quick Clean – Using materials to run through the grinder
- Deep Clean – Taking the grinder apart and manually cleaning the inside
Here is a table summarizing the methods you can use to clean your burr grinder, I’ll go into the details below.
| Rice | Cleaning Tablets | Disassemble | |
|---|---|---|---|
| Cleaning Efficiency | Low | High | Deep clean |
| Cleaning Time | Short | Short | Long |
| Convenient | Yes | Yes | Labor-intensive |
| Cleaning Interval | 2x per month | 2x per month | Every 1-2 months |
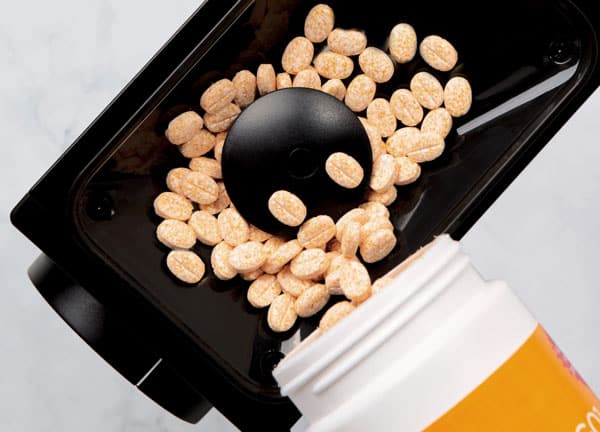
Method 1: Grinder Cleaning Tablets
Arguably, the easiest way to quick-clean a burr coffee grinder is to buy grinder cleaning tablets and let them do the heavy lifting instead.
Pros of using grinder cleaning pellets:
- Makes cleaning simple and easy since you make the coffee grinder clean itself, so many opt for this method.
- Most of these tablets are organic and leave no aftertaste.
- They’re also tough enough to push out any leftover coffee beans still inside and delicate enough to avoid damaging the interior.
- Tablets are not as expensive as you think. A 430g (15 oz) box contains enough tablets for 1 year’s cleaning of a home grinder.
So it’s great to use on grinders, plus, they’re extremely convenient!
To do this, you’ll need the recommended amount of cleaning tablets per your owner’s manual (in this case, I used 40g cleaning tablets).
Directions
- Dosing: Use the recommended amount of cleaning tablets per your owner’s manual.
- An electric home burr grinder usually needs about 40g of cleaning tablets.
- If you are cleaning a manual hand grinder, you can use a smaller dose of cleaning tablets and run it just as you would with an electric grinder.
- Pour cleaning tablets into the hopper
- Turn on the grinder, and run it on a medium-fine setting.
- Turn off the grinder until you see the tablets have become dust.
- Put some spare beans into the hopper and rerun the grinder.
- Repeat if there is still an oily feeling when you touch the burr.
Method 2: Disassembling for Deep Cleaning Your Grinder
If you want a deeper clean with your burr grinder, disassembling it is inevitable. There are some corners your cleaning tablets can’t reach, so you need to clean them manually every month or so.
Not only that, but the feeling of putting back together a clean grinder you personally toiled away at is satisfying in itself.
You’ll need:
- Dry towel or microfibre cloth
- Toothbrush, brush, etc.
- G-tips, toothpicks
- Soapy water (for the hopper and grounds bin only!!!)
Step 1: Empty your grinder
- Remove the coffee beans from the hopper
- Turn the grinder on and run it until there’s no stuck coffee left.
Step 2: Unplug the Grinder
- Unplug the grinder from the power source to ensure that it’s safe to clean.
Step 3: Hopper and ground bin
- Remove the hopper and the grounds bin.
- Wipe down the plastic parts with a damp cloth or a soft brush.
- Use a bit of soapy water for this, making sure to remove any residue and to dry the pieces thoroughly before reassembling.
- They may even be dishwasher-safe, depending on the grinder.
- Clean only these pieces with soapy water, nothing else!
- Dry the pieces thoroughly before reassembling them.
Step 4: Disassemble the Burrs
- Check the manual of the grinder to see the parts that can be removed.
- Do not remove any parts that are not supposed to come off.
- Most burrs come off by gently jimmy-ing it out of the machine, turning something, or loosening a screw or two.
- Remove the upper burr and set aside
Step 5: Vaccum
- Use the hose attachment of the vacuum cleaner to suck up any coffee particles.
- Be careful not to suck in small pieces like screws.
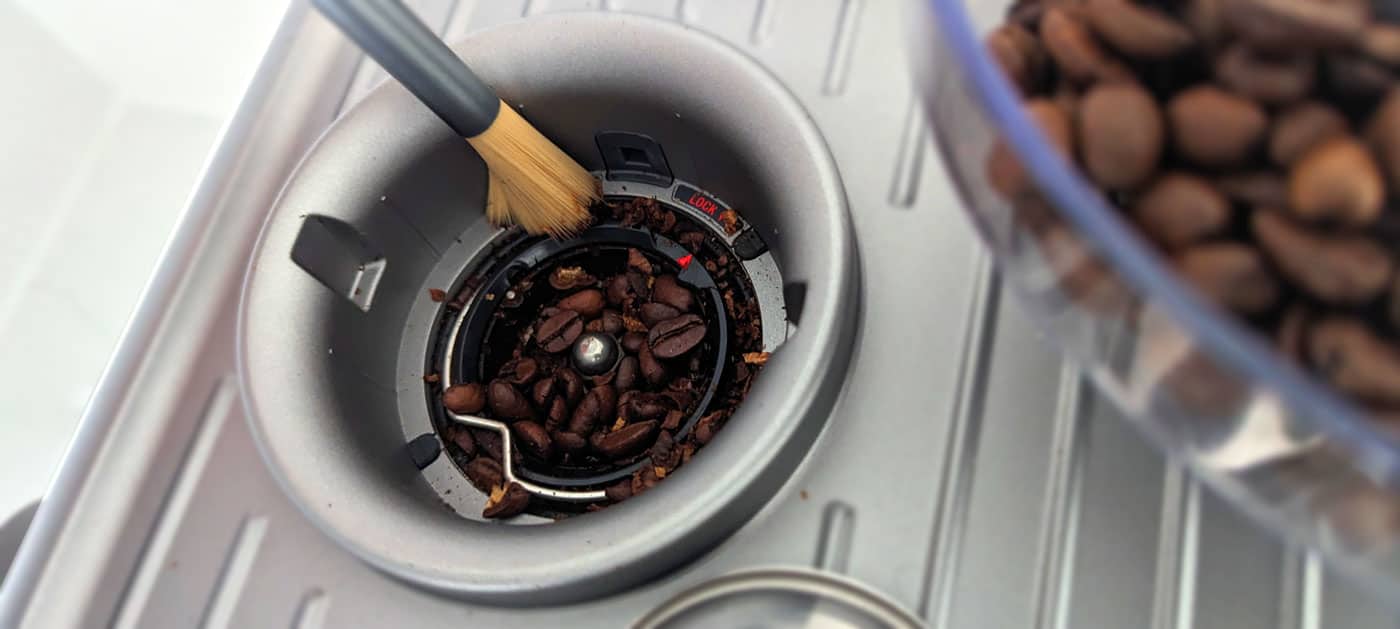
Step 6: Shake and Scrub the Grinder
- Turn the grinder upside down and give the sides a few taps to shake out the coffee grounds and dust.
- Repeat this until almost nothing comes out.
- Use a soft brush to scrub the upper burr you already took out, as well as the inside of the grinder to remove the coffee grounds and dust that’s clinging to the surfaces.
- Use wooden toothpicks and cotton swabs to clean the corners, crevices, and feeder channel, making sure to remove old grinds and oils.
- Pay special attention to the feeder channel, as it can easily get clogged with fine, oily grinds.
Step 7: Wipe and Reassemble
- Wipe down the hopper and grinds bin to make sure they are clean and dry.
- Reassemble the grinder, making sure that all parts go back to their rightful place.
Step 8: Season the Grinder (optional)
- Grind a small amount of coffee after cleaning the grinder to get it ready to use again.
- Use a handful of coffee beans and make sure that the adjustment settings are right.
Can You Clean Burr Grinders With Rice?
Yes, you could use rice to clean your burr grinder, but you shouldn’t. You’re replacing a problem with another problem.
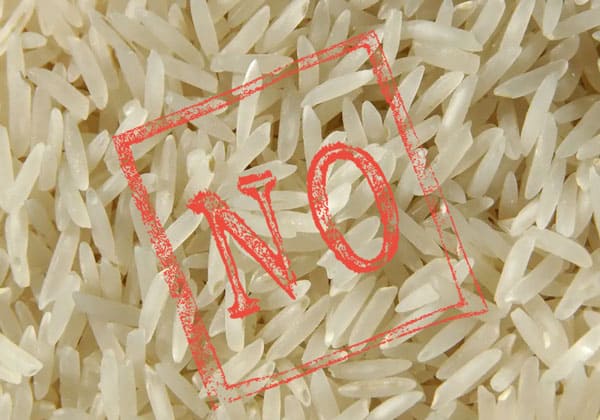
Some say using rice is a good substitute for pellets to clean the burrs… I shrink back a little when I hear that.
Here is why
- Rice, unlike cleaning tablets, is a more rigid material that might damage both the burrs and the motor of your grinder. Burr grinders are designed for grinding coffee beans – and only coffee beans.
- Even manufacturers like Baratza do not think cleaning your coffee grinders with rice is a good idea.
- Another point is that while rice may be an excellent absorbent and remove any coffee oils, it can also leave behind starch (the white substance you see when you wash rice). This leaves behind a stickier residue, effectively ruining your grinder.
How often should you clean a burr grinder?
If you use your coffee grinder every day, you can use the cleaning tablet method every 2 weeks and then do a more thorough cleaning using the disassembling method every other month.
If you’re not planning to use it for a while, deep clean your grinder before storing it.
Daily maintenance of a burr grinder
The rule of thumb is to brush off any excess coffee grounds and powder every time you use your grinder.
If you wipe down the grinder with a cloth after every use, this will significantly reduce the time you’ll need to clean your grinder.
Steps to clean a blade coffee grinder
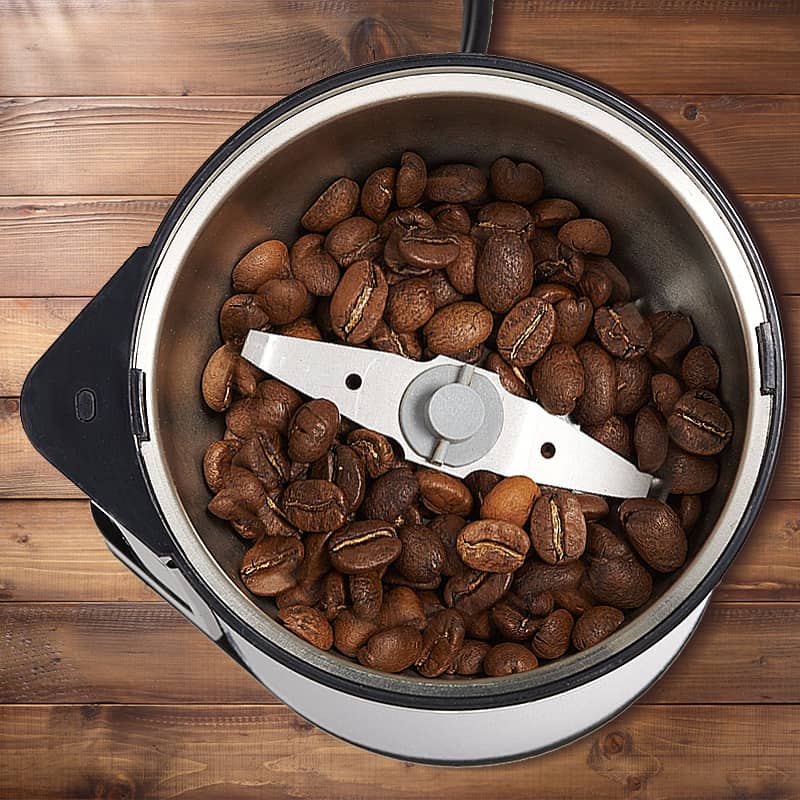
Cleaning a blade grinder is easier and less time-consuming than burr grinders due to its simple nature. Here is the way you can do that:
Rice Method
Unlike burr grinders, blade coffee grinders benefit from cleaning with rice since it simultaneously sharpens the blades while cleaning them. You can also use alternatives like grains or grinder cleaning tablets to do the job, but rice is more economical to use.
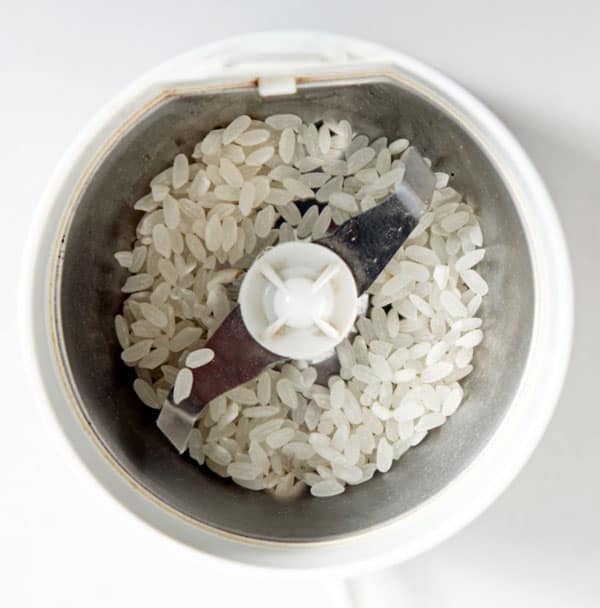
What kind of rice should you use to clean a blade grinder?
- Use white rice only, since brown rice has a tougher exterior due to its husk being present.
- Another thing to note is to use dry, uncooked rice since it has less starch and is more abrasive.
Directions:
- Fill the grinder with dry, uncooked rice.
- Turn on the grinder and run it on a medium-fine setting.
- Turn off the grinder when you see the rice turn powder-like.
- Dump out the rice grounds and throw them away since your powdered rice is now contaminated with stale coffee oils.
- Repeat until you feel there are no oils left in your grinder.
- Wipe down the inside of the grinder with a microfiber cloth to remove leftover starch.
- Put some spare beans into the hopper and rerun the grinder.
How often should you clean a blade grinder?
If you get into the habit of wiping your grinder clean after each use, you will only need to clean your grinder with rice, preferably once every 2 weeks.
Also, avoid grinding spices in your blade grinder. If you simultaneously grind coffee beans and spices, the spices will also get stuck to the interior of the blade (which will leave a weird and inconsistent taste in your coffee).
You can also deep clean the grinder monthly with a damp microfiber towel and then wipe down the interior. Take extra care around the blades since it is probably sharp. Afterward, wipe it with a dry towel to avoid rusting the blades.
Frequently-Asked-Questions
Ready To Clean Your Grinder?
Whether you have a burr or blade grinder, it’s essential to clean it often to keep it in top shape.
So, take the time to show your coffee grinder some TLC; a clean coffee grinder is one of the gateways to making a mean cup of joe!