
11 Common Hario V60 Brewing Mistakes & How to FIX Them
Are you tired of brewing lackluster coffee with your Hario V60, despite following all the “right” steps? Sometimes it clogs, or flows too quickly, or just doesn’t taste all that great?
You’re not alone – even experienced baristas can struggle with this popular pour-over method, as the V60 is notoriously finicky and unforgiving.
So today, I’m here to help by pointing out the most common V60 brewing mistakes people make and how to troubleshoot them.
Key Takeaways
- Adjust your grind size based on the issues you’re experiencing: coarser for over-extraction and finer for under-extraction.
- Pour gently and slowly in concentric circles using a gooseneck kettle to ensure even extraction and a flat coffee bed.
- Start with a coffee-to-water ratio of 1:16 and 195-205°F (90-96°C) water temperature for the ideal results.
1. Grind Size Mistakes
The grind size is very important for making coffee with the Hario V60.
- Channeling often happens because of inconsistent grinds, so you need a good grinder.
- Too coarse grind can make the water flow too fast, resulting in a weak and sour cup.
- Too fine and it becomes a bitter, over-extracted mess that drips slowly.
You want to aim for a medium-fine grind, similar to table salt. I usually make it a few notches finer than what I’d use for French press or Chemex.
If you hit this sweet spot, extraction should finish in about 3 to 4 minutes tops. If it’s too fast and weak, grind finer; if it’s slow and bitter, grind coarser.
This will take some tweaking with your given grinder, and will even need adjusting with different coffee beans.
2. Improper Pouring Technique
The pouring plays a key role in making a great pour-over coffee, it’s in the name after all.
It’s all about speed and precision. When people pour too fast or in the wrong places, the coffee tends to have uneven extraction.
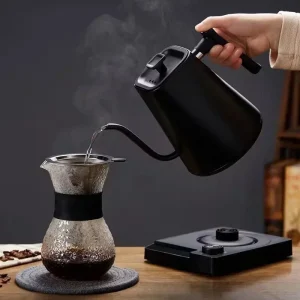
- First of all, it’s best to have a gooseneck kettle, as it makes aiming your water flow easier.
- Pour slowly and steadily in concentric circles, starting from the center and spiraling outward. Don’t hit the sides of the filter.
- Each pour must take about 10 to 15 seconds, saturating all the grounds evenly.
- You also want to keep the pouring height at 2 inches above the bed, to avoid splattering too much agitation.
Be patient. The more you do this, the easier it gets as you develop some of that muscle memory.
And remember to use a scale and timer to keep those pours in check.
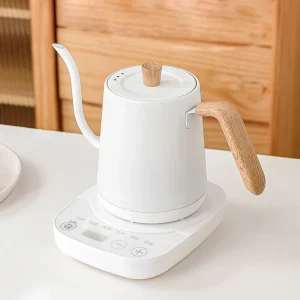
Here are some gooseneck kettles you can get directly from our store.
-
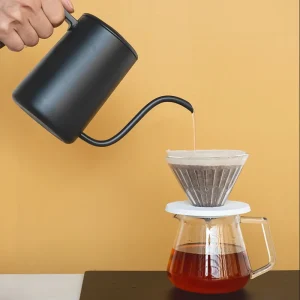

TIMEMORE Fish Pure Gooseneck Kettle
$78.90Select options This product has multiple variants. The options may be chosen on the product page -

Electric Gooseneck Kettle with LED Display
$85.90 – $87.90Select options This product has multiple variants. The options may be chosen on the product page -

Electric Gooseneck Kettle
$73.90 – $79.90Select options This product has multiple variants. The options may be chosen on the product page -
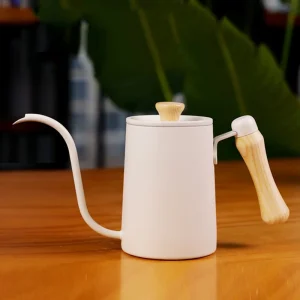

600ml Gooseneck Kettle with Walnut Handle
$34.90Select options This product has multiple variants. The options may be chosen on the product page
3. Unchecked Water Quality
The water quality is also something many V60 newbies disregard. This is especially true if they’ve been accustomed to using brewers with built-in water filters.
However, if you’re using hard water or water with too many minerals for your V60, these compounds can interfere with the extraction, giving you a bitter and dull cup.
The ideal water should have a balanced mineral content or alkalinity and a neutral pH.
What works for me is filtered tap water using a high-quality solo in-line water filter connected to my faucet. You can just go for filtered or bottled water with moderate mineral content.
If you want to go deeper into this topic, read my article on the best water for brewing.
4. Water Temperature Errors
The water temperature is another key player in your coffee’s extraction. To be honest, it was one of the things I used to overlook when I was starting as a barista.
Boiling water scorches the grounds resulting in harsh and bitter compounds. If it’s too cool it will struggle to extract your coffee’s flavours and you’ll get an underdeveloped cup.
- Generally, heat your water to meet the recommended 195-205°F (90-96°C).
- Lighter roasts are harder to extract, so aim for the top of this temperature range.
- Dark roasts are easy to overextract though, so I’ve found that using 90°C water is best.
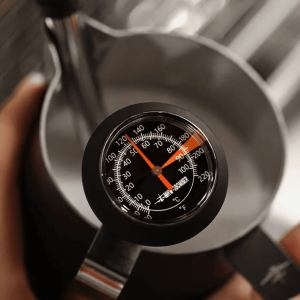
It’s a rookie mistake not to check the water’s temperature, so a thermometer or a smart kettle really goes a long way.
-
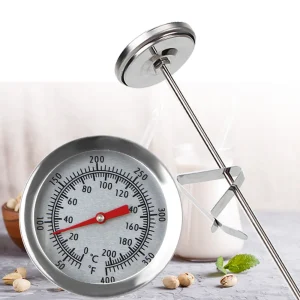

Stainless Steel Temperature Probe
$9.90Select options This product has multiple variants. The options may be chosen on the product page -
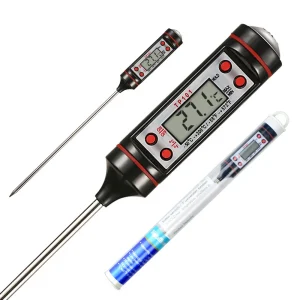

Pen-Shaped Temperature Meter
$8.90 – $9.90Select options This product has multiple variants. The options may be chosen on the product page -

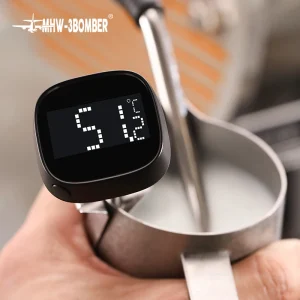
MHW-3BOMBER Temperature Meter
$10.90 – $23.90Select options This product has multiple variants. The options may be chosen on the product page -

-
Sale!
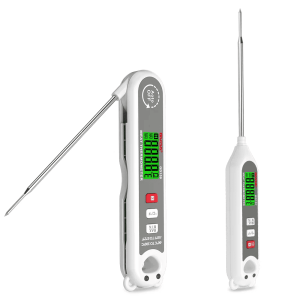

Foldable Temperature Meter
Original price was: $17.90.$15.90Current price is: $15.90.Select options This product has multiple variants. The options may be chosen on the product page
But if you don’t have either, just let your boiling water sit for 30 seconds before making your coffee. This cools it to around 95°C.
5. Wrong Brew Ratio
Not nailing the coffee-to-water ratio can also cause your cup to have imbalanced flavors.
I actually encourage experimenting with your pour-over brew ratios, primarily to adjust the strength of your cup. But if you overdo it then you’ll just be making bad coffee.
A brew ratio of 1:16 is a good starting point, which translates to about 22g of coffee grounds to make a 350g brew. If you’re making adjustments, limit it to 1 or 2 grams at a time until you find the coffee that suits your taste (our brew ratio calculator can help you).
And don’t overload your V60, as trying to craft a larger batch than the dose limit will just result in uneven extraction and clogging.
6. Skipping the Bloom Phase
Another common mistake by beginners is not blooming the coffee. This is when you pre-wet the grounds to let them degas and prime them for even extraction.
If you don’t bloom your coffee, you’re more likely to make a sour and uneven coffee with a lack of complexity.
So start blooming! Simply do the following steps:
- Pour water that’s about twice the weight of your coffee grounds.
- Let it sit for 60 seconds. You should see the coffee bed swell and bubble.
- After the bloom, proceed with the main pour.
For more details, check out my full coffee blooming guide. If you get this process right, you’ll be rewarded with a more balanced, flavorful cup.
7. Forgetting to Agitate
Agitation is a good thing when we’re talking V60 brewing. It’s often overlooked, causing dry clumps and channels in the coffee bed, which results in both over- and under-extraction in different spots.
It’s a simple step, so don’t forget to properly agitate as you brew with the V60.
- Just use a spoon or stirrer paddle and gently stir after the main pour, creating a swirl in the slurry.
- You’ll know you were successful if you see a nicely shaped mound in the middle of the filter after the coffee has dripped down.
Also keep in mind that you don’t want to agitate too vigorously, as this can cause fines migration, where the coffee fines are drawn to the bottom of the coffee bed and clog the filter.
8. Bad Coffee Bean Quality
If you ask me, pour-over is one of the most unforgiving brewing methods with regard to the quality of coffee beans.
So if you’re sipping on a subpar cup of pour-over coffee, it might be because you’re using low-quality, stale, or mismatched beans.
If you want the best results, invest in freshly roasted and high-quality single-origin beans with good quality. The rule of thumb is to pick beans that are roasted within the last 2 to 3 weeks and stored properly. Read our guide on how to store coffee beans for maximum freshness.
Another tip is to go for light to medium roasts with high elevation. I find them to have the best balance of sweetness, acidity, and complexity. If you’re not sure where to start, just ask your local specialty coffee shop for recommendations to find that origin that speaks to you.
Save the dark roasts for cold brews 😉
9. Clogging the Filter
If your V60 brew seems like it takes forever to drip through, then you may be dealing with a clogged filter. If the coffee can’t pass through the filter smoothly, you’ll get an over-extracted cup that’s more like a sludge than a smooth brew.
The reason the V60 gets clogged is that there are too many fine particles that can create a dense, impenetrable layer in your filter.
How do you prevent clogging? One solution is to invest in a high-quality burr grinder that produces a consistent particle size. You can also sift your grounds before brewing to remove excess fines.
If you’re faced with this issue, you can also give the slurry a gentle stir to break up any fines and get things flowing again.
10. Filters Causing Off-Flavors
Ever sipped on your V60 coffee and there’s something off with the taste? Pre-wetting your filters might be that missing link to a better brew.
Just rinse your paper filter with hot water and discard the water after. This seems insignificant but it can be a game-changer to your pour-over coffee.
While we’re on filters, it’s also important to pick the correct V60 filter and make sure that it is properly folded, fully opened, and seated correctly on your dripper.
Note: If you have Kalita Wave 185 filters lying around, you can actually use them with the 2-cup V60. I’ve tried them before and it worked pretty well.
11. Neglecting Your V60
Don’t forget your V60’s cleaning and maintenance. Over time, oils and residue can build up on your pour over coffee maker, imparting bad taste to your coffee, or even cause excess clogging.
Since it’s a simple brewer, cleaning the V60 is very easy:
- Give your dripper a quick rinse after each use and dry completely before storing.
- For a deep clean, mix equal parts water and vinegar and fill the dripper halfway. Let it sit for 15 minutes before rinsing it with fresh water.
Remember that with the V60, or with any coffee maker really, a little TLC goes a long way.
You’re All Set
Aside from pulling espresso shots, I’m a big fan of brewing with the V60 (just read my V60 review), and I hope this article helped you with your coffee. So let me know how it went for you in the comments below.


Wow, I followed the tip about adjusting the grind size, and after a few tries, I found the perfect setting on my grinder. No more sour coffee, just a rich and full flavor every cup.